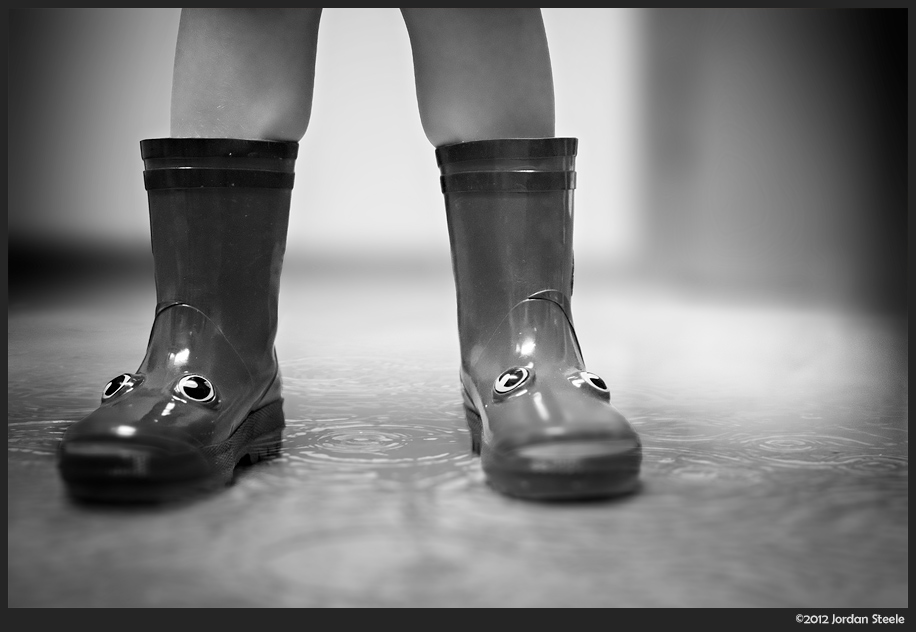
I took this photograph yesterday morning. It’s my daughter, wearing her little frog boots, and ready to go outside. I took this shot with one thing in mind, but after viewing the original image, I decided to do some editing to make the image fit the vision that was in my head. I normally don’t do heavy editing or compositing on my images. I do color and contrast adjustments, the occasional cloning of distracting hairs or rocks or such, and some toning, dodging and burning. However, sometimes to get the vision I want, I’ll do a bit more work. It’s rare, but I do it sometimes. This was one of those times. Here’s how I did it.
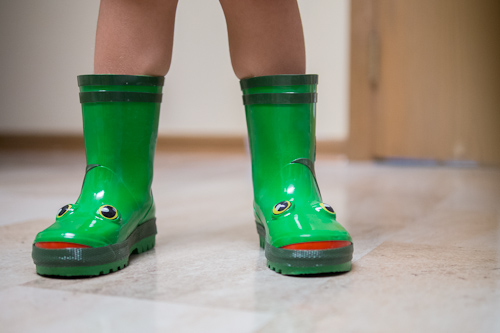
I started by importing the images into Lightroom like I always do. The original image, straight from RAW is seen below. I liked the composition, but the depth of field wasn’t quite as shallow as I wanted, as the door frame located behind the boots was visible and somewhat distracting.
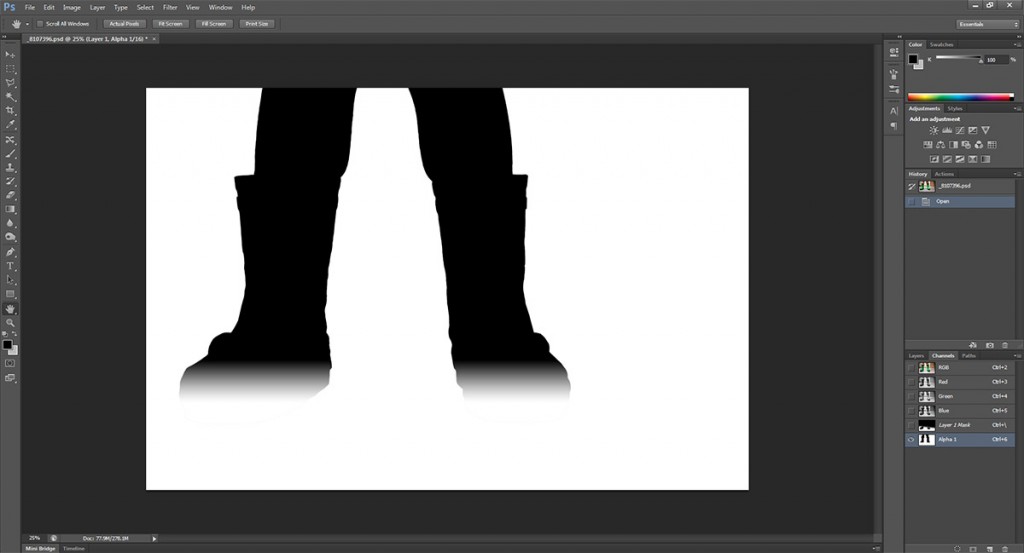
I started by duplicating the layer in Photoshop CS6 and I created an outline of the boots with the magnetic lasso tool to isolate the boots. I then created a new channel with the selection, which saved the selection and allowed me to further edit the mask. See, I wanted the boots to remain sharp, but also wanted to simulate additional blur. To do this, the eyes on the frog, and the legs needed to not be affected by the blur, but I wanted the toes of the boots to get the additional blurring…so I did a gradient on the alpha channel to allow for some blurring of the boots. The channel looked like this:
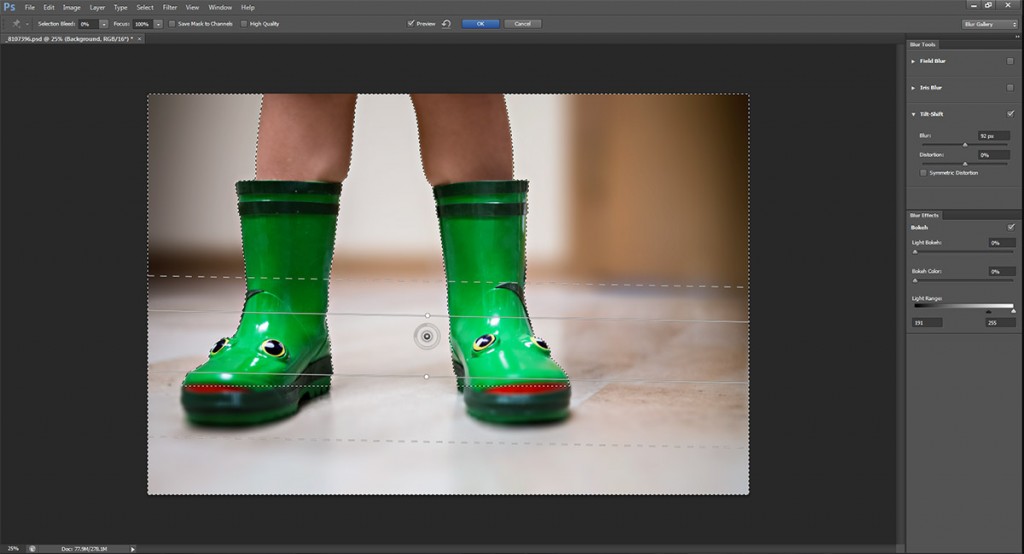
I then inverted the selection, so the background was selected instead of the boots. I then activated Photoshop CS6’s new blur tools. I used the Tilt -Shift blur, which can also approximate depth of field blur in this situation. I set the range of sharp focus to be on the boots, with the furthest blur line at the wall, and a decent transition zone, then cranked up the blur until it looked how I wanted.
I then did some color and contrast adjustment and such before trying a black and white conversion in Silver Efex Pro 2. It looked OK, but something was missing. She was wearing rain boots, after all. I found myself wishing that it had been raining already and we’d gone outside to take a picture in a puddle. Then I had an idea….why not make it look like there’s a puddle in the house? So I went looking for a water drop/puddle image that would work well. I didn’t have any easily available, so I went looking for publicly available images to use for the composite. I ended up using a wallpaper that had been shared on a ‘free sharing’ site for wallpapers, with everything provided for free use. I brought that image in, aligned it with the floor, and masked off the areas so it didn’t extend beyond the door, and I loaded the selection from earlier to mask out the boots. I also ran the same blurring that I did for the floor and background on the water layer, so they matched. The water layer looked like this:
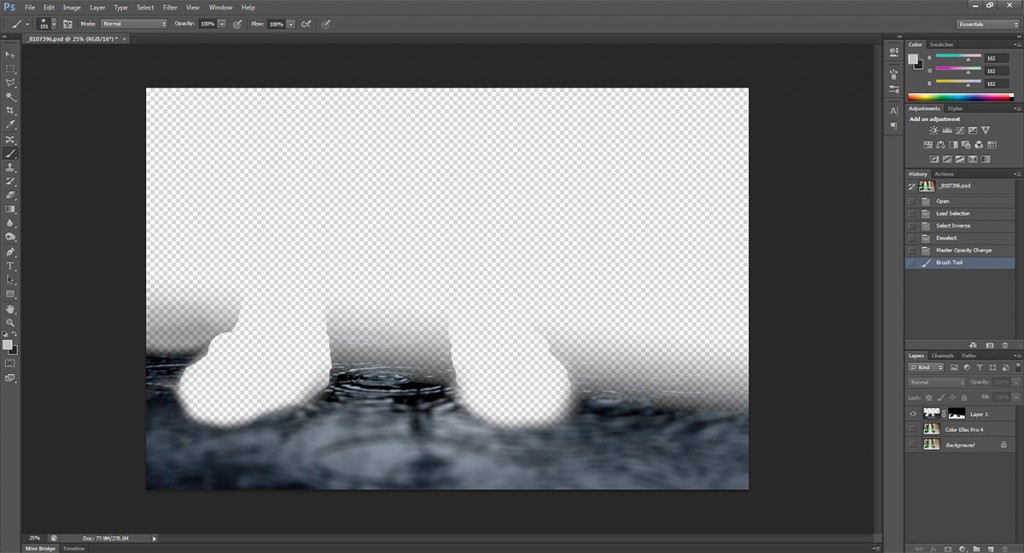
I worked on blending the water layer in using layer masks, until it looked realistic. I then used the ‘luminosity’ blending mode so that the color of the water didn’t impact the floor below. After I got it the way I wanted, I saved the image, processed it in Silver Efex Pro 2 for the black and white conversion, and the result is the final image as seen at the beginning of this post.
Overall, I am very pleased with how it came out. I’m sure there are others who can do a better compositing job, but I’m quite happy with the final image, and it fits with what I had in my mind when I started working on the image. Hope you enjoyed this little insight into the creation of an image!



Leave a Reply