Waterfall Season

Waterfall Season

Spring is in the air, and the world is turning green once again.  Spring is also the time when many waterfalls tend to run at their fullest, so now is an ideal time for photographing waterfalls. I’ve taken advantage of some of the flow already, though a few weeks more will bring brighter and more lush vegetation surrounding these lovely natural features.

If you haven’t tried your hand at shooting waterfalls, or are looking for some help in getting the most out your waterfall photos, here are some important things to keep in mind.

A Tripod is a Must

It may seem obvious, but waterfalls are one of the subjects that really requires a tripod for the best images.  Not only because many waterfalls look best when shot with longer exposures to provide a nice smooth look to the water, but also because the best compositions for waterfalls are very often in positions that are extremely awkward to hand hold.  Having a good tripod is also a necessity.  Often the terrain will be uneven, and often the best compositions come from standing in the stream itself, so being able to precisely place the legs and having a tripod that will keep the camera steady even with the flow of water around the legs is essential.
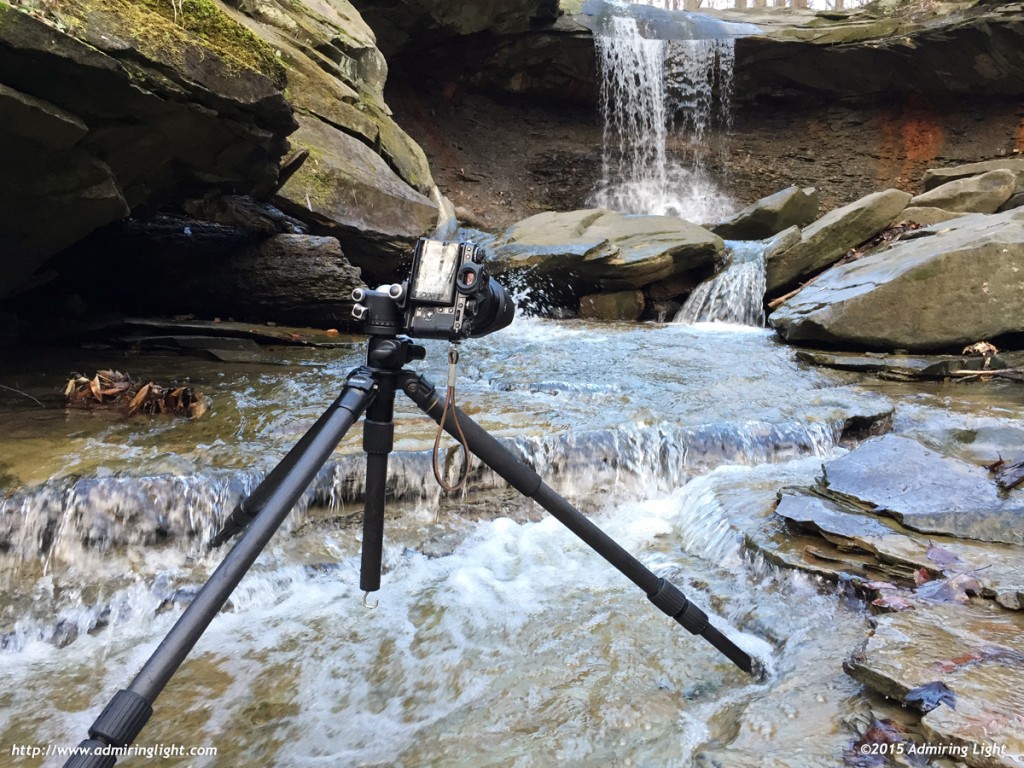
A solid tripod can get you the angle and stability needed to get the shot

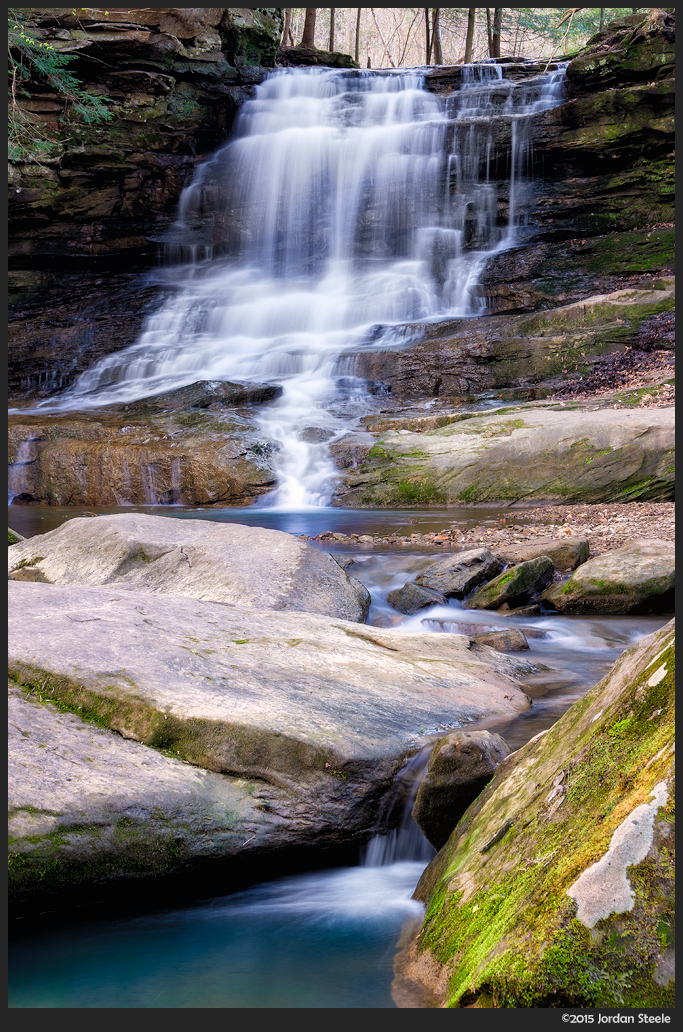
One major point: if you’re going to go into the stream, please make sure that it is both safe to do so, and that your actions won’t damage the banks or any vegetation.  You’re there to record the scene, not leave your mark on it. The above shot shows my tripod while I was shooting images at Blue Hen Falls. The stream has a slate rock bed, so I felt comfortable in my waterproof boots shooting down in the stream.  If there are soft banks or fragile plants, please keep to any trails. See the image below that was captured from this position.
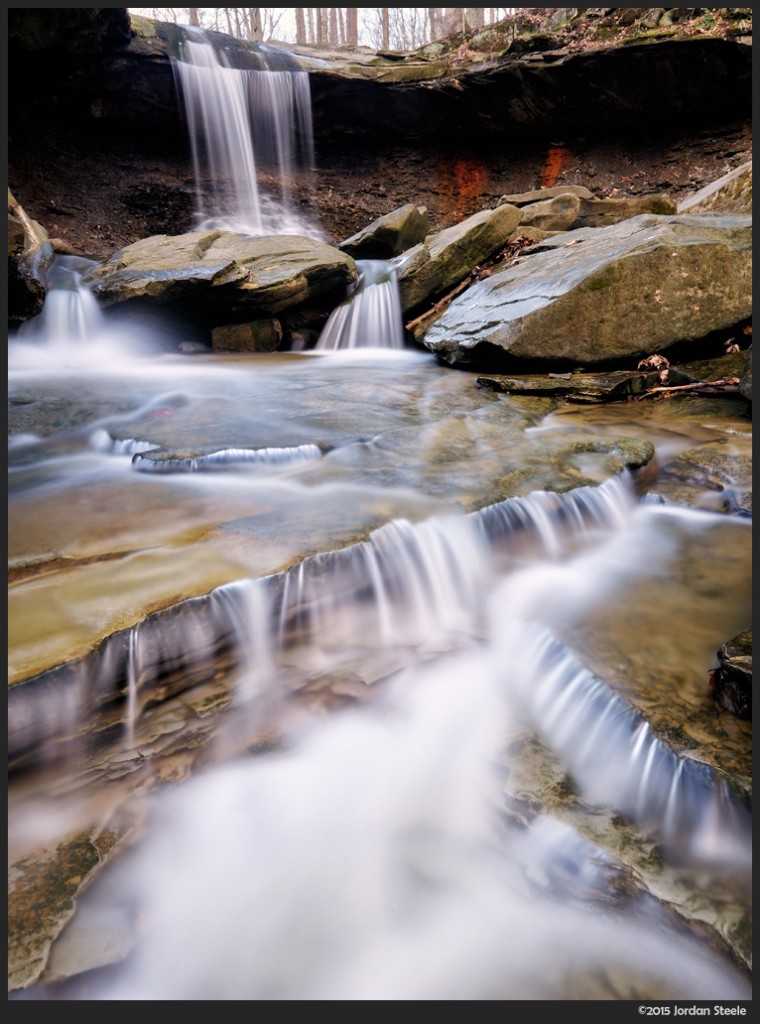
Blue Hen Falls - Fujifilm X-T1 with Fujinon XF 10-24mm f/4 @ 15mm, f/16, 20s
Blue Hen Falls – Fujifilm X-T1 with Fujinon XF 10-24mm f/4 @ 15mm, f/16, 20s

Polarizing and Neutral Density Filters

Polarizers and neutral density (ND) filters are the two filters that both truly still have a place in any photographer’s kit in the digital age.  While other filters can have their effects replicated with digital postprocessing tools or multiple exposures, these two filter types can’t be faked, and both come in very handy for shooting waterfalls.

First off, let’s talk about the polarizing filter.  A circular polarizer is something every outdoor photographer should have in their bag.  The filter works by cutting out light of a certain polarization that is reflected off of surfaces.  Rotating the filter allows you to choose which angle of light polarization is cut out.  The result is the ability to remove glare from water, darken blue skies and increase saturation on damp or glossy vegetation.  When shooting around waterfalls, almost all the surfaces will have some moisture on them, and therefore reflecting glare is very common.  While images without a polarizer will look fine, being able to cut that glare can dramatically improve the look of a photograph.

For a prime example of the effect of a polarizer, take a look at the images below.  These images were taken from the exact same location within 20 seconds of each other.  The only difference is that I attached my polarizer between exposures.  The first image shows the scene without a polarizing filter.  It’s a fine shot, but the colors are muted, only green and brown come out, and there is pretty heavy glare off the sides of the rocks and a strong reflection in the pool at the bottom of the image.
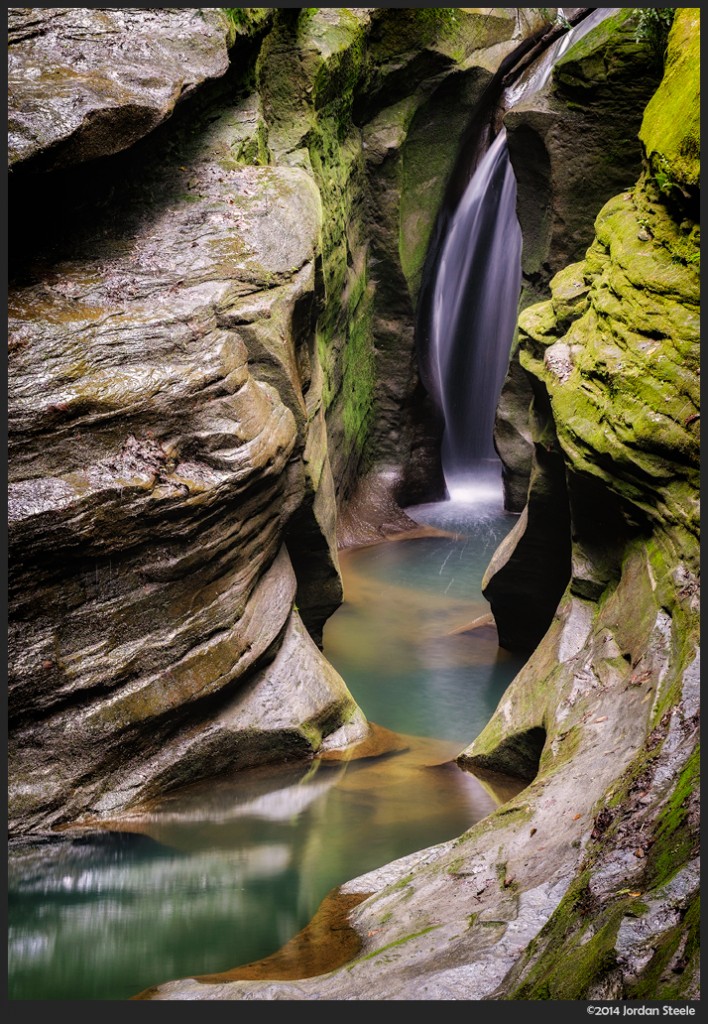
Corkscrew Falls - No Polarizer
Corkscrew Falls – No Polarizer

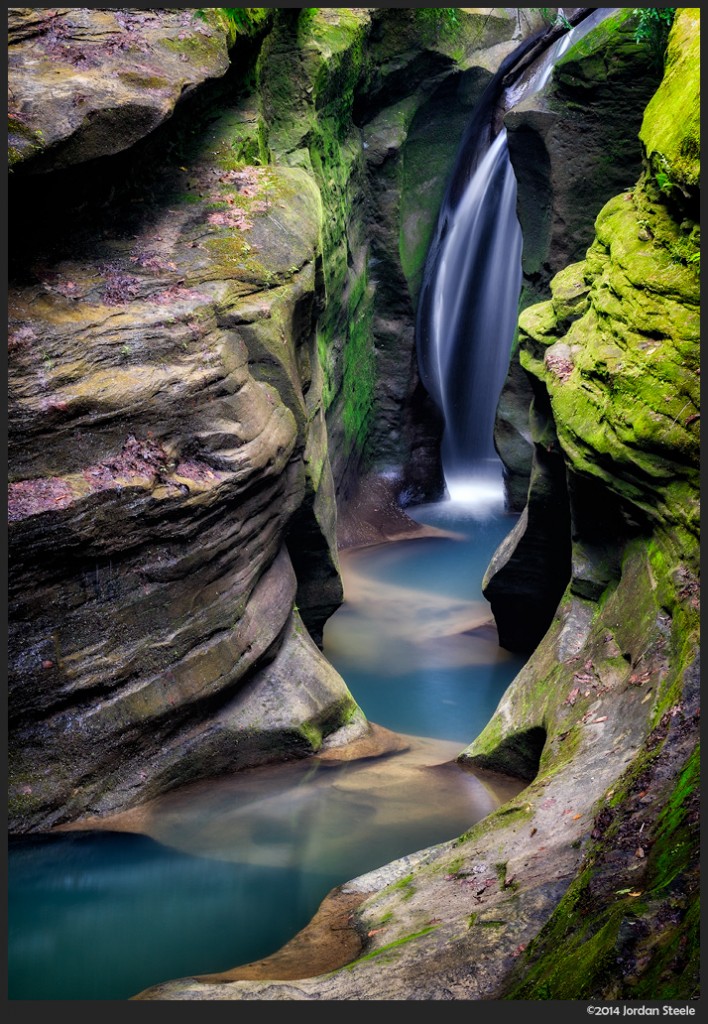
Now, take a look at the result with a polarizing filter.  The processing on the two images is nearly identical (I did some finer color correction on the one below, since it was the one I finalized for print).  The glare on the rocks is gone, showing the texture of the stone. The glare on the water is also gone, allowing the blue color of the water to shine through as well as extra detail in the sandstone gorge bottom.  The overall effect is striking.
Corkscrew Falls - With Polarizer
Corkscrew Falls – With Polarizer

Another filter worth packing for waterfall shooting is a neutral density filter.  Simply put, an ND filter simply lets less light into the lens, without altering color balance.  ND filters are available in a variety of strengths, from 1-2 stop filters useful for cutting back the light a bit, all the way to 10 stops or more that can allow for minutes long exposures in mid-day sunlight.  Using these filters can allow for longer shutter speeds to blur water movement, even when it’s bright outside.  For most shooting of waterfalls, a 3 or 4 stop filter comes in quite handy.  This should allow for exposures of at least 1/2 second in daylight, when stopping down the lens to f/11 to f/16.

Exposure Tips

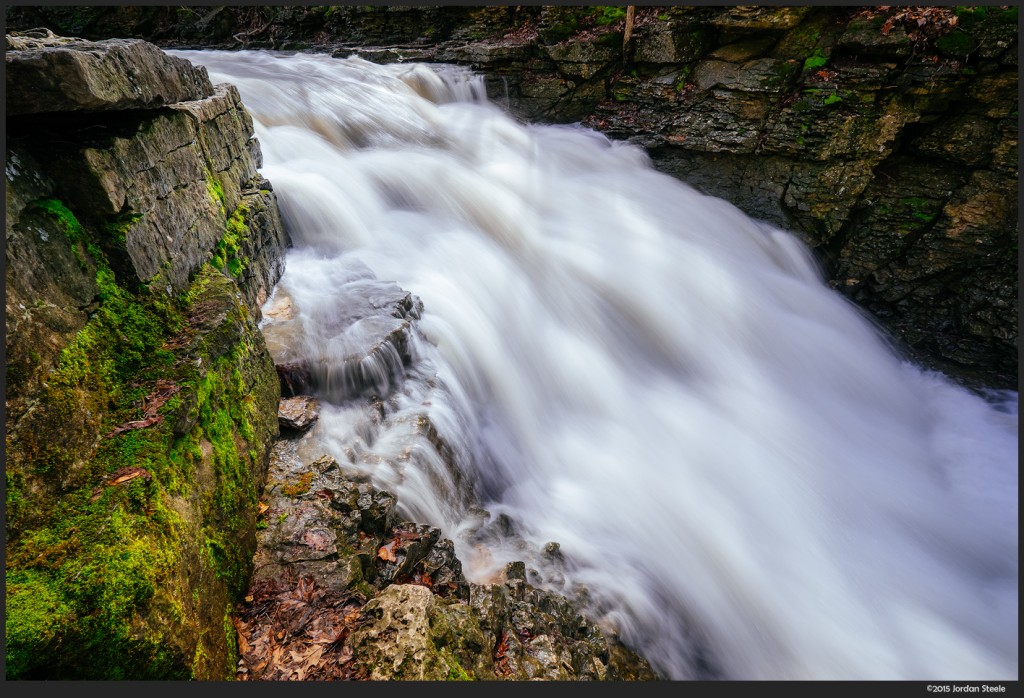
Since we’re on the subject of lengthening shutter speeds, let’s talk about exposure time.  There’s a few different schools of thought when it comes to how long you should expose a waterfall, with quite a lot of people enjoying the silky look of a long exposure, while others find that look cliché or ugly.  I personally quite enjoy the smooth water look for most waterfalls, but it really depends on what you’re trying to show in your final image.  Freezing the motion of a waterfall can often be rather ugly aesthetically, while in other cases a long exposure will eliminate too much detail. However, in both cases, it’s up to the photographer to judge based on the scene in front of them.  The shot below was shot at 0.4 seconds, which was about the longest I wanted to let the shutter open on this shot.  The falls had extremely heavy water flow, and anything longer just blurred far too much detail out of the image.
Indian Run Falls - Fujifilm X-T1 with Fujinon XF 10-24mm f/4 @ 10mm, f/8, 0.4 sec
Indian Run Falls – Fujifilm X-T1 with Fujinon XF 10-24mm f/4 @ 10mm, f/8, 0.4 sec

For my own shooting, I often end up shooting very early in the morning, especially in areas where there’s a fair amount of tourism, as I don’t have to deal with people walking in and out of my frame.  As a result, I often deal with long exposures by necessity.  For most of the waterfalls in Ohio, which often don’t have a super-high flow, the silky look of a long exposure works best anyway.  I do think, however, that heavy flowing waterfalls demand a shorter shutter speed in most cases.  First off, a shutter speed of 1/2 second or so will still show plenty of motion, but will also help capture some of the power of the falls.  For really huge waterfalls crashing on rocks, very short shutter speeds might be desired to really capture the power of the water. Often, exposures of 1/2 to 2 seconds are great. For a serene or sometimes surreal feel, longer exposures can also be excellent.  Experiment and determine what you like best.

Composition Tips

Here are a few other things to keep in mind when shooting waterfalls.  First of all, shots of the main cascade of a fall can be very nice sometimes, but often they can be sterile or boring if there’s nothing leading your eye into the frame.

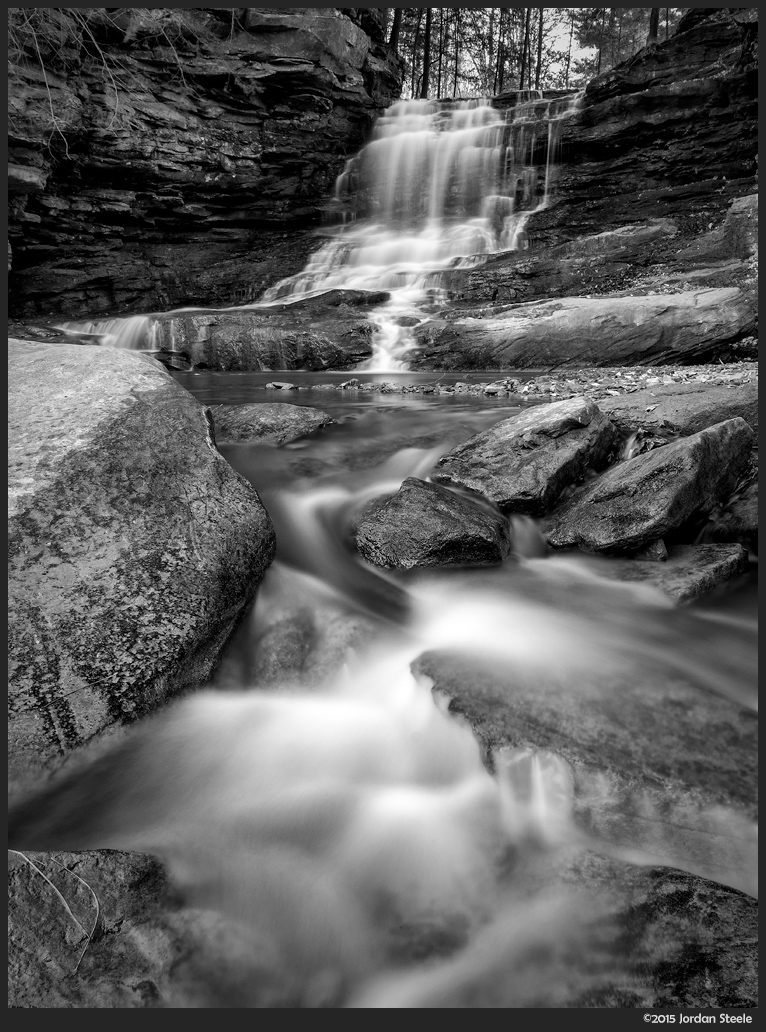
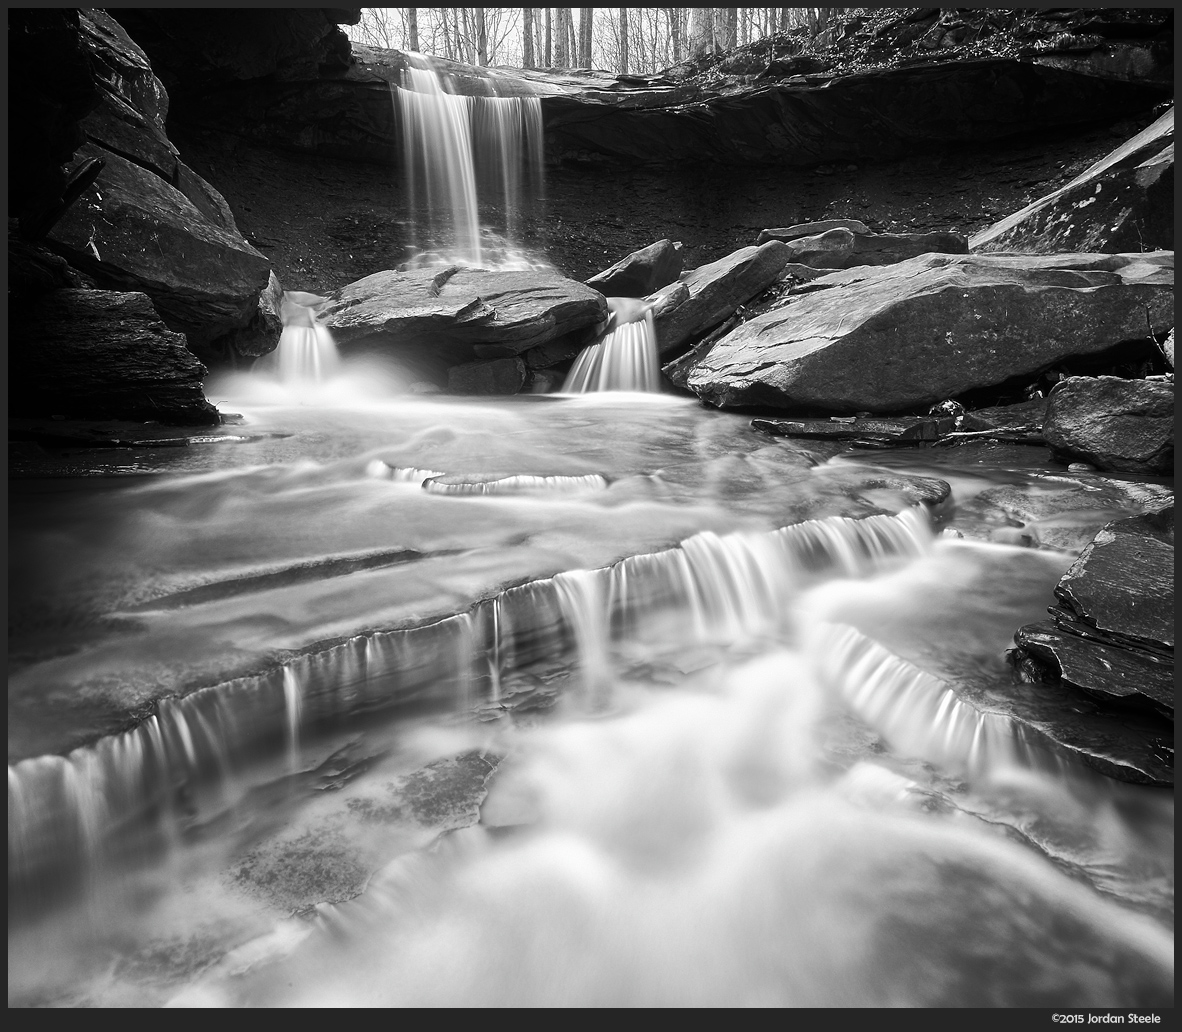
Keep an eye out for minor cascades below the main falls.  Often these will switch back and forth, creating far more interesting patterns than the main cascade.  It’s worth exploring lots of different angles, trying to visualize how your eye leads into the frame before setting up and taking the picture.  The shot below, taken this morning, illustrates this perfectly.  I took shots from about 6 different angles in this area today, and then I’d review the image and try new compositions, though most were small refinements on this scene.  I finally managed to find the angle that reached the proper balance, with lots of foreground interest leading your eye into the frame.
Blue Hen Falls - Fujifilm X-T1 with Fujinon XF 10-24mm f/4 @ 12mm, f/18, 15sec
Blue Hen Falls – Fujifilm X-T1 with Fujinon XF 10-24mm f/4 @ 12mm, f/18, 15sec

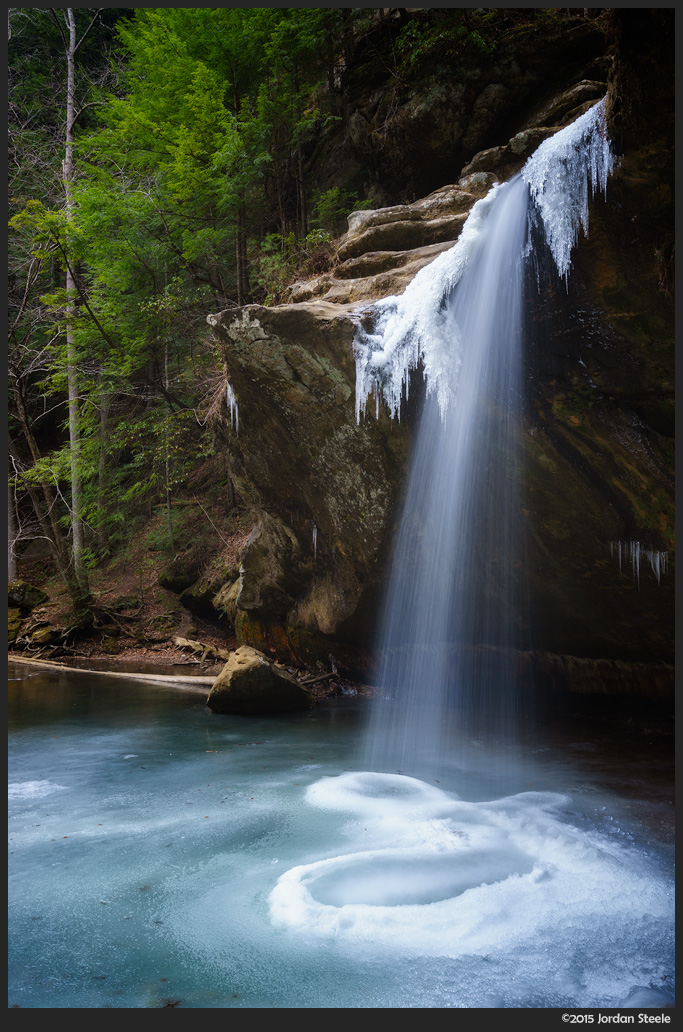
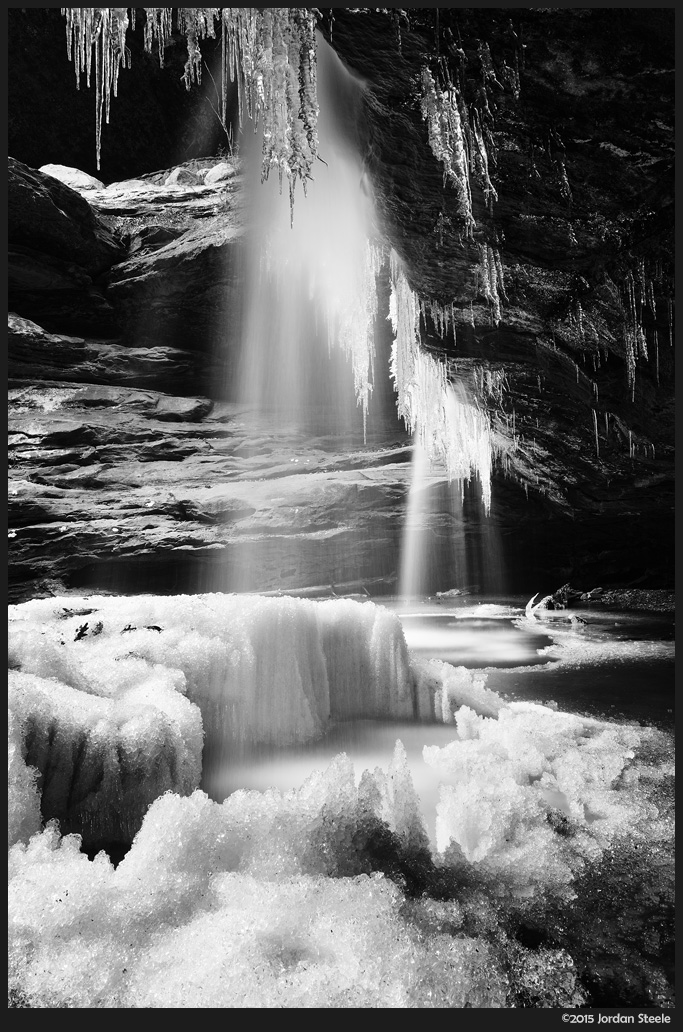
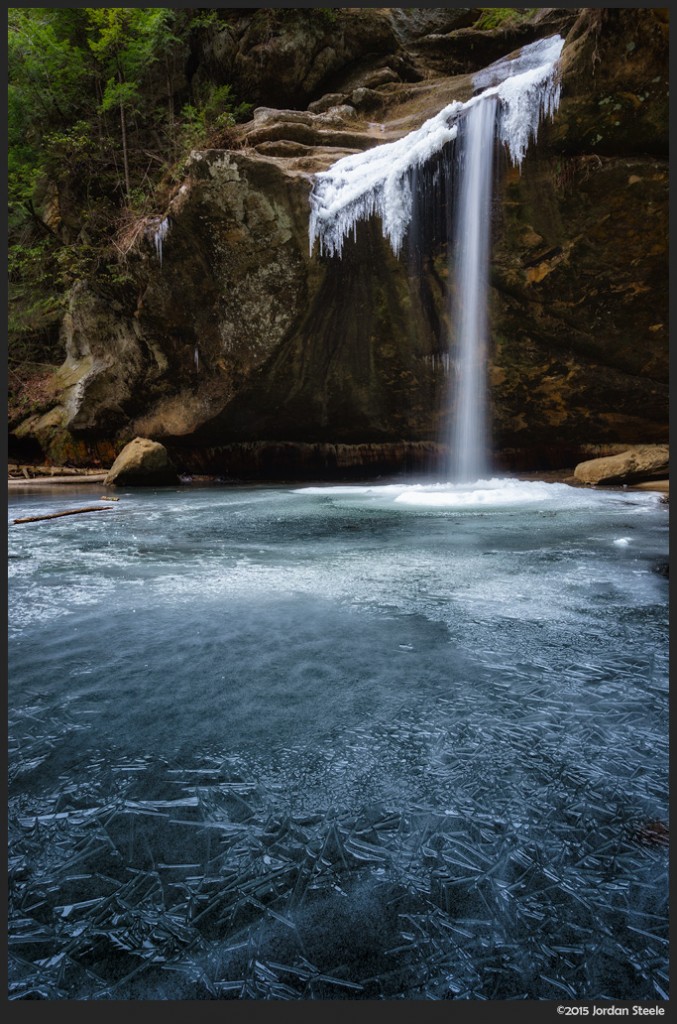
Second, context for an image can also help set the scene.  Perhaps there’s a bridge nearby, or leading rocks.  Often there may be a stark clifside next to the falls, or ferns or other interesting plants along the stream bank.  Using these elements to help frame the waterfall can add another dimension to the shot. For the shot below, I positioned the camera very low, sitting on the frozen pond below the falls, focusing on the patterns in the ice, helping set the scene of winter despite the lack of snow.  Experiment with different scenes and different looks.  There are times I’ll work a single waterfall for two hours, finding all sorts of different ways to look at a scene.  Don’t forget to have fun!
Ice at the Lower Falls, Hocking Hills State Park, OH - Sony a7 II with Carl Zeiss FE 16-35mm f/4 OSS @ 19mm, f/18, 0.8s, ISO 100
Ice at the Lower Falls, Hocking Hills State Park, OH – Sony a7 II with Carl Zeiss FE 16-35mm f/4 OSS @ 19mm, f/18, 0.8s, ISO 100

Image Samples

Finally, I thought I’d share a few more waterfall shots of mine from this year so far.  Click an image to enlarge. Happy waterfalling!
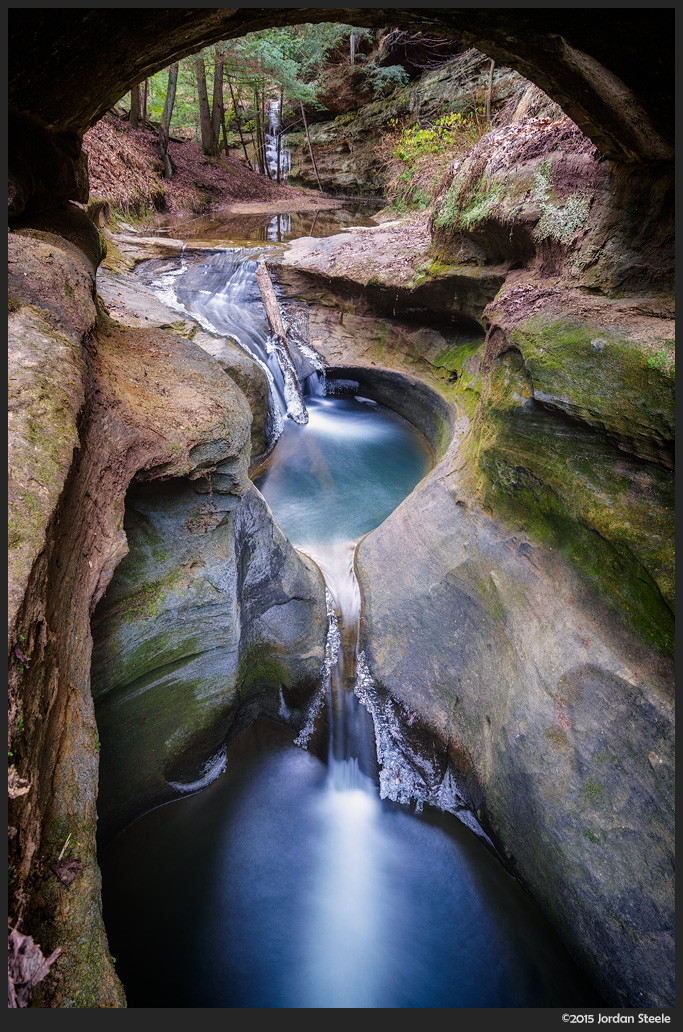
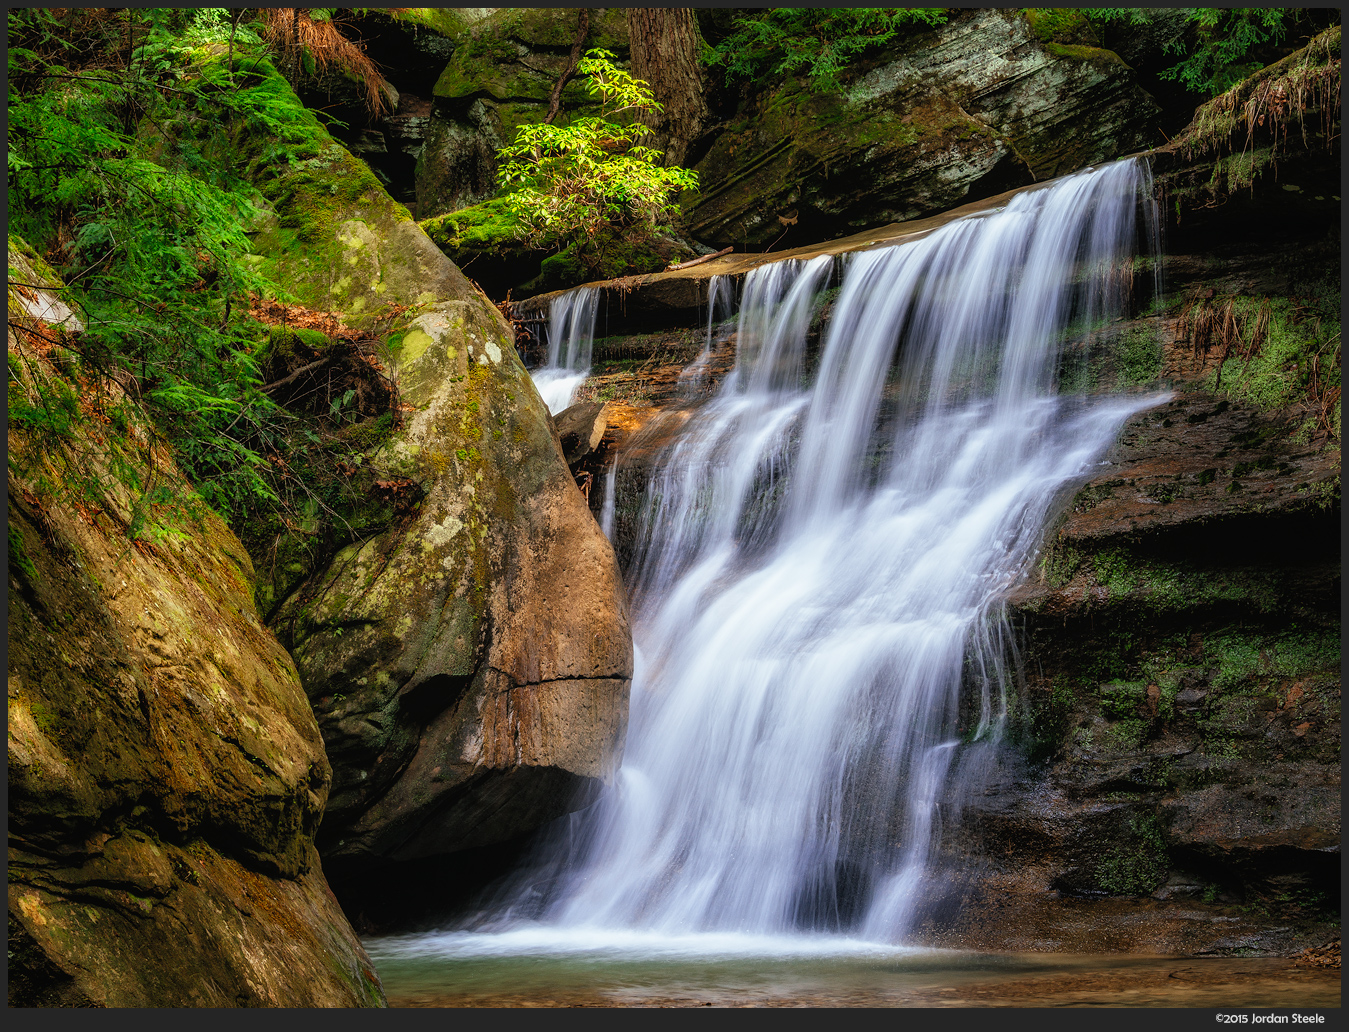
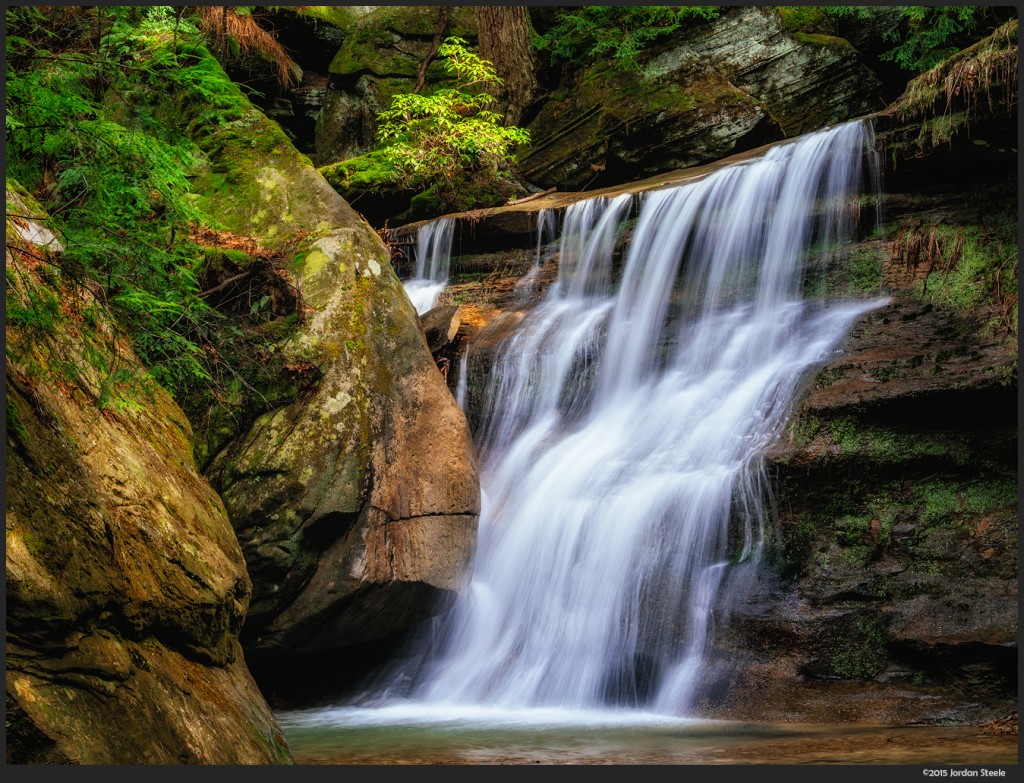
Devil's Bathtub, Hocking Hills State Park, OH - Sony a7 II with Carl Zeiss FE 16-35mm f/4 OSS @ 16mm, f/11, 15s, ISO 100
Devil’s Bathtub, Hocking Hills State Park, OH – Sony a7 II with Carl Zeiss FE 16-35mm f/4 OSS @ 16mm, f/11, 15s, ISO 100
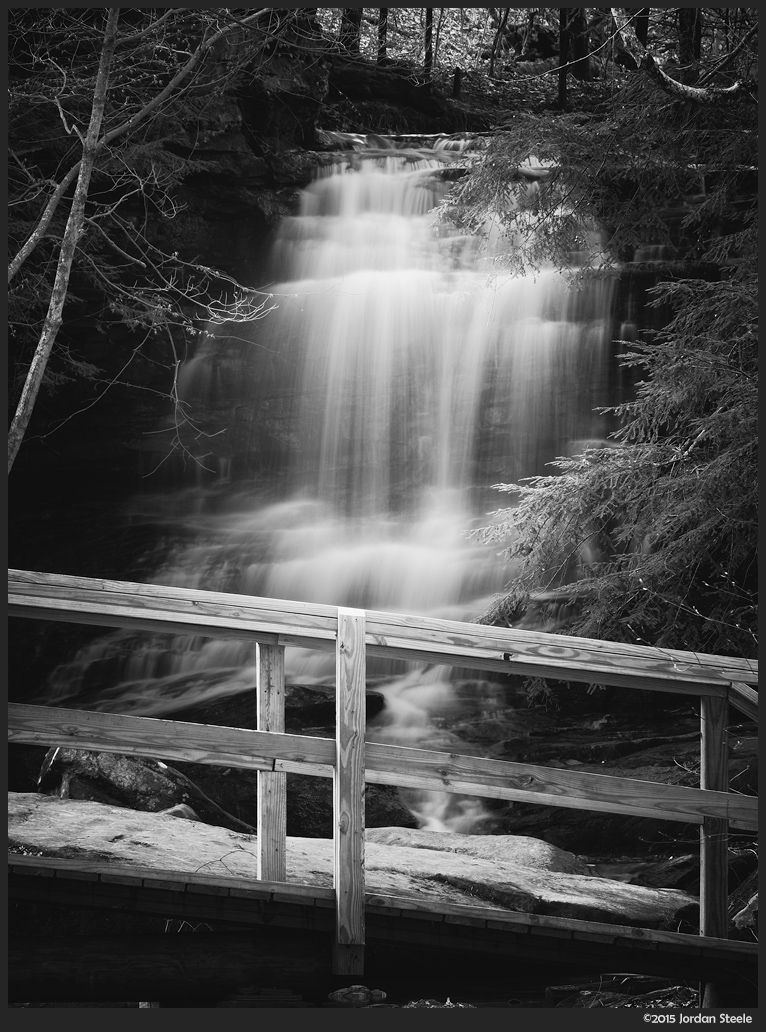
Honey Run Falls - Fujifilm X-T1 with Fujinon XF 55-200mm @ 200mm, f/16, 2.1s
Honey Run Falls – Fujifilm X-T1 with Fujinon XF 55-200mm @ 200mm, f/16, 2.1s
Side Falls, Hocking Hills State Park, OH - Olympus OM-D E-M5 with Panasonic 35-100mm f/4-5.6 @ 35mm, f/11, 1/2s
Side Falls, Hocking Hills State Park, OH – Olympus OM-D E-M5 with Panasonic 35-100mm f/4-5.6 @ 35mm, f/11, 1/2s
Honey Run Falls - Fujifilm X-T1 with Fujinon XF 10-24mm @ 20mm, f/16, 20s
Honey Run Falls – Fujifilm X-T1 with Fujinon XF 10-24mm @ 20mm, f/16, 20s
Lower Falls, Hocking Hills State Park, OH - Sony a7 II with Carl Zeiss FE 16-35mm f/4 OSS @ 28mm, f/18, 1.3s, ISO 100
Lower Falls, Hocking Hills State Park, OH – Sony a7 II with Carl Zeiss FE 16-35mm f/4 OSS @ 28mm, f/18, 1.3s, ISO 100
Middle Falls, Hocking Hills State Park, OH - Sony a7 II with Carl Zeiss FE 16-35mm f/4 OSS @ 29mm, f/14, 13s, ISO 100
Middle Falls, Hocking Hills State Park, OH – Sony a7 II with Carl Zeiss FE 16-35mm f/4 OSS @ 29mm, f/14, 13s, ISO 100
Honey Run Falls - Fujifilm X-T1 with Fujinon XF 18-55mm f/2.8-4 @ 48mm, f/11, 2.6s
Honey Run Falls – Fujifilm X-T1 with Fujinon XF 18-55mm f/2.8-4 @ 48mm, f/11, 2.6s

Tags:

Comments

5 responses to “Waterfall Season”

  1. Alex Dodis Avatar
    Alex Dodis

    I “admire” your blog site, your realistic unbiased opinion, technical knowledge and photographic technique.
    Most impressive is that your photos are much to my style and stand on their own, even without the accompanying article.

    Converting to mirrorless, after a lot of soul searching for what really mattered technically and practically to allow the camera to be an unobtrusive tool conducive towards better photographic creativity, I had to compromise between a OMD EM-5 mk. II and a Fuji XT-1 system. I still feel insecure about that decision…

    What is your experience with equipment water proofing?
    I was thinking of the tripod for example.
    How do you deal with mist sticking to the lens?

    Alexander

    1. Jordan Steele Avatar

      Thanks for the kind words!

      For most waterfall shooting, it’s not a big deal to not use weatherproof equipment, as the gear doesn’t get too wet. I got a few drops here and there on the lens barrel, which posed no problem (even though the 10-24 isn’t sealed). The biggest issue when shooting close like this is drops splashing on the front. In this case, on my polarizer. It’s not so much a problem for gear damage, but for having blobs in the frame, as wide focal lengths stopped down for deep depth of field will show small drops on a filter or front element. You just need to check the front of the lens from time to time and wipe off any drops with a microfiber cloth to keep the images clean.

      Overall weather sealing, I’ve had great success with the OM-D series and their sealed lenses: really good weather resistance, and aside from keeping drops off the front, it’s no issue to shoot in the rain. I’ve also shot in the rain with my X-T1 and some of the WR lenses, and they do a good job too on the actual lens body and camera body. I think Fuji’s sealing system at the lens mount isn’t quite as robust as many other makers, so I wouldn’t feel comfortable shooting in heavy rain with it for a significant amount of time, but it’s fine for a passing shower or occasional splashes here and there.

      My tripod poses no issues getting wet, though it’s important to extend the legs and loosen the locks and allow it to air dry so you don’t get mold growth or anything after shooting. Luckily, my tripod comes apart pretty easily if I need to clean the locking joints as well, so if things start sticking or smelling, I can take the legs apart and clean them, letting all parts dry before reassembly. If I don’t need to be super low, I’ll extend the lower leg sections (as seen in the photo of the tripod) so that the leg locks stay out of the water.

  2. Ron Avatar
    Ron

    Hey Jordan,

    Great site, and as others have said elsewhere, I really like the way you write up your reviews. I’ve been shooting with an X100T for about 6 months (previously lots of film cameras from Nikon to Leica).

    Anyway, after finally getting back into photography, I’m full on hooked again. I’m ordering an XT1 along with the 10-24 and 18-55 in a few days. My question relates to waterfalls and long exposure in general, as I live in the Northwest and love shooting landscapes. A couple of quick questions:

    1. Are you using a Lee or similar system for your ND’s? I have the Seven5 system for the X100t but it won’t work with the 10-24 so i need to buy the 100mm system, which is fine. What ND filters would you suggest to start with? I was thinking the 3 stop and the 6 stop Little Stopper, which would get me 3-6-9. The X100T has built in 3 stop, so i get 3-6-9 now with my LS and it seems to work in the waterfalls i have shot so far.

    2. If you are using the lee, do you recommend the Lee polarizer to attach to the front, or do you prefer a screw on first, and then attach the Lee system for your ND’s to the front of that? If you go this second route, which brand of polarizer do you recommend? I’ve used Heliopan and B&W and had good results, but i value your opinion on this.

    3. Do you use your 10-24 under 14mm enough to justify it over the XF 14mm? That lens is supposed to be very sharp, but I imagine the flexibility of the 10-24 is what wins out here?

    Sorry for the long post! Thanks you in advance for your reply if you have time.

    Best regards,

    Ron

    1. Jordan Steele Avatar

      I use screw-on ND filters (no graduated filters), so I’m not using any of the square filter systems. In areas where graduated filters would be useful, I generally take two images and merge them in post, as I find I get finer control over the image that way. I have used B+W filters on several occasions, but have been using the Hoya Pro1 and HD2 filters recently. I like the HD2 filters a lot, as they are really strong glass, have excellent coatings and the polarizer cuts less light than most (only around 1 stop).

      As to the 10-24, my 14/2.8 has been sitting on a shelf since I got the 10-24. The versatility and extra width are more important for me, though the 14mm is a bit better optically.

  3. Lee Graber Avatar

    Hi Jordan,

    Awesome shots and thanks for all the great advice. I also shoot with the xf10-24 and I am considering purchasing a screw-on ND and Polarizing filter to shoot water environments. In what order do you attach the filters to the lens? Does the polarizing filter attach first so that you can frame your shot and adjust the direction of the filter to reduce reflections without the darkening of he ND? Do you have any mechanical vignetting issues at 10mm while stacking both the polarazer and ND? Would it be a good idea to attach a 72-77mm step up ring and use 77mm filters to reduce possible vignetting if that is an issue? Thanks for your help!

    – Lee

Leave a Reply

Your email address will not be published. Required fields are marked *

This site uses Akismet to reduce spam. Learn how your comment data is processed.

Search


Categories


Recent Posts


  1. I think it is near Hillsboro.

  2. This article got me thinking… Why does Canon make RF S lenses starting with 18mm when most full frame RF…

  3. Great review. I shoot Nikon and may try an old Nikon D200 and see how it compares with the new…