In-Body Image Stabilization (IBIS)
The GX8 is the second Panasonic camera to feature in-body image stabilization, after the GX7. Panasonic has improved the stabilizer by allowing it to work in tandem with most optically stabilized Panasonic lenses as well, helping to gain an extra stop or so of handholding. However, like the GX7, I found the IBIS of the GX8 to be a step behind the other systems that feature body-based stabilization. While occasionally I was able to get sharp shots at 3 stops slower than my normal hand-holding shutter speed, I could generally only count on one to two stops of stabilization in my daily shooting, with one stop really being the only level I could consistently count on. Because the IBIS wasn’t consistently stable at the slower speeds, I generally had to treat the stabilizer as if it were only good for one stop. It’s disappointing that Panasonic hasn’t been able to figure this one out, as Olympus continues to improve its amazing IBIS, which now can easily stabilize for 4 stops on bodies like the E-M1 and E-M10 Mark II, and even 5 is possible with the new E-M5 Mark II. Sony’s Mark II bodies in the A7 series all features internal stabilizers that are generally good for around three stops of stabilization.

The only optically stabilized Micro 4/3 lens I have is the tiny 12-32mm f/4-5.6 pancake zoom, which is compatible with the new Dual IS system present on the GX8. Again, I didn’t notice any major improvement vs. the bare lens. The 12-32mm’s optical stabilizer was generally good for 2-3 stops, while the lens in Dual IS mode gains perhaps another half a stop to one stop. It’s not a big difference, and still falls behind what the Olympus bodies can do with IBIS alone. It’s nice that Panasonic continues to work at improving the IBIS system on the GX series, but to date, it’s a largely ineffective stabilizer.
4K Photo Mode and Post Focus
Panasonic cameras led the way with 4K video capabilities long before most makers had the capability to shoot 4K video footage at all. They also lead the way with figuring out how to use that 4K video footage to further stills shooting with 4K photo mode. In 4K photo mode, the camera effectively takes short bursts of 4K video footage, then allows you to select individual frames to export, producing an 8 megapixel final image. 8 megapixels is a far cry from the 20 available on the sensor, but it’s still plenty of resolution to make decent sized prints, and more than enough for most on-screen display.

In 4K photo mode, you select one of three ways to capture the 4K burst. You can have it operate just like any other continuous shooting burst, where the burst starts when you fully depress the shutter and stops when you release it. A second mode allows you press the shutter once to start and again to stop a burst, and a final mode creates a continuous buffer at all times, and when the shutter is depressed, it captures the action starting a second or two BEFORE you pressed the shutter. However you activate it, the idea behind 4K photo mode is having 30 frame per second bursts so that you capture the decisive moment in a still image. Shooting a group of toddlers who never look at the camera at the same time? Use 4K photo mode to get the one frame that has all the children with eyes open looking at you. Capturing a shot that requires precise timing? 4K photo mode can help increase the chances of nailing the perfect moment.
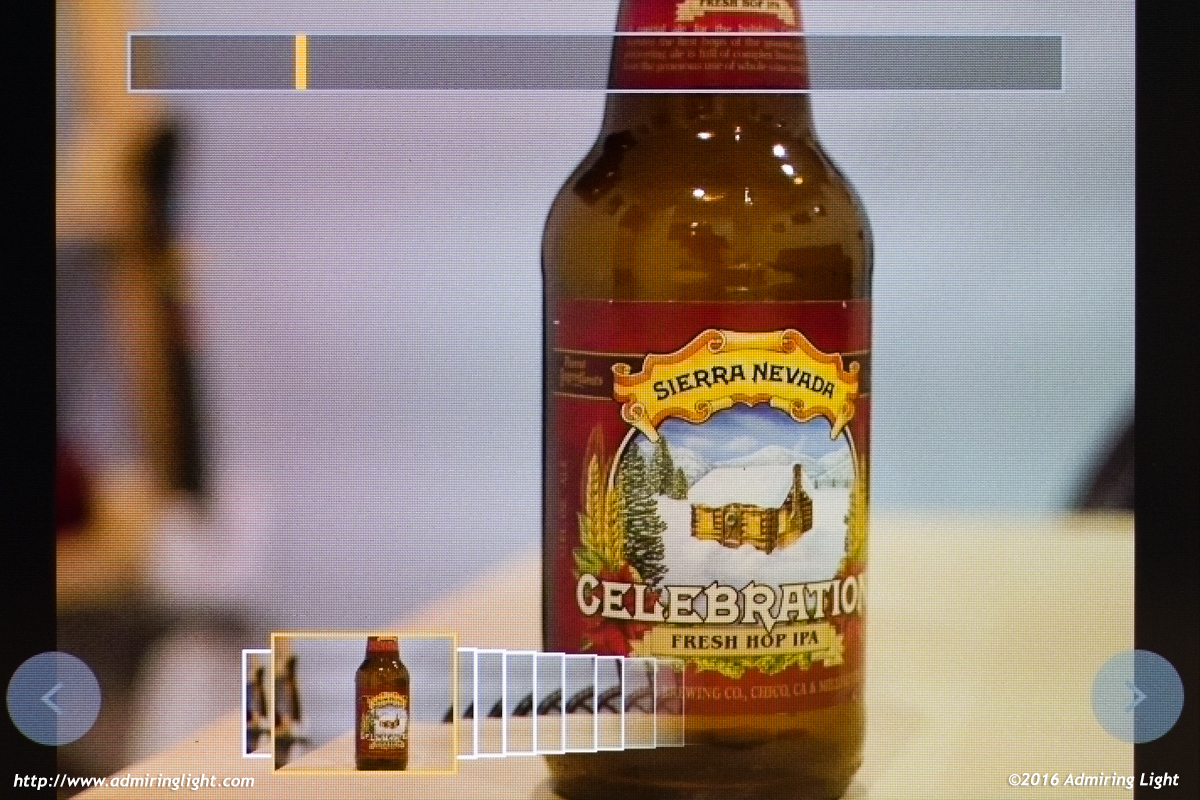
Because of the lower resolution and limitation of electronic shutter and JPEG only output, I wasnt a big user of the 4K photo mode in my time with the camera, but it’s great to have for special situations like the ones I laid out above. The picture above shows the interface after capture. While the photo taken for the above example obviously didn’t need 4K photo mode, I just wanted to show how Panasonic designed the post capture interface. Scrubbing along the image timeline at the bottom goes through the burst frame by frame. Faster scrubs can be done at the top and the buttons on the side also advance a frame at a time. Once you have the frame you like, simply select the ‘OK’ button and the image will export that frame to a JPEG.
Post Focus
Panasonic also uses the GX8’s 4K photo mode to engage in a bit of fun with their Post Focus mode. This mode takes a very short 4K video clip but steps the focus point of the lens through every area in the frame. You can then, on the rear of the camera, choose the frame that has the focus point you most want. The way of navigating can be done in the filmstrip style selection mode, as with regular 4K photo clips, or you can simply tap on the image where you’d like the image to be focused, and the camera will find the frame that was taken at that focus point. Then export it and you’ve got the 8MP JPEG image.

As neat as this feature sounds, in reality, it’s really not going to come in handy very often. Because it’s a clip, it’s not going to be useful for action (a moving subject will be in a different part of the frame at each focus point), it’s lower quality than choosing a focus point in advance and it is limited in the settings available when utilizing the feature. Overall, it’s a neat trick, but I think the potential for great imagery from it is fairly minimal.
Wi-Fi
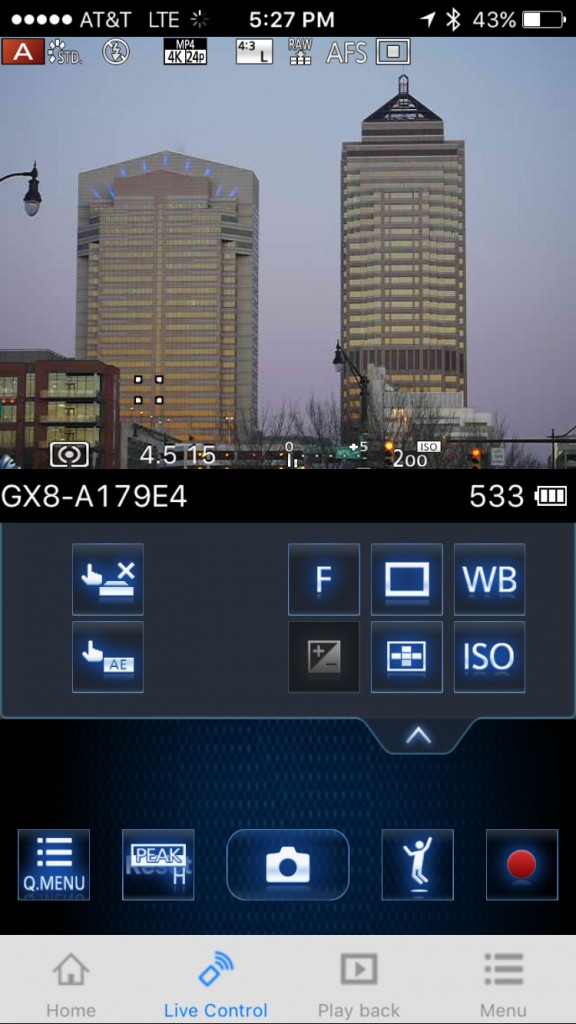
Like all current mirrorless cameras, the GX8 has full-featured Wi-Fi capabilities. The GX8 can connect to your mobile device and transfer images, tag images with GPS location or remotely control the camera. Panasonic predominantly does an excellent job with their Wi-Fi system, with a very full feature set that operates smoothly in most circumstances. Where it doesn’t operate smoothly is in setting up the connection at first. There are a multitude of ways to connect your device to the phone, but the sheer number of ways to do it and the less than clear names and instructions makes it often difficult to remember which one you should use in what circumstances. Setting up a direct connection doesn’t work smoothly at all if you choose an image and then select the option to transfer the image to the phone. However, that option is readily available with the WiFi function soft-button on the touch screen, or by going through the menu system. Once you’ve finally connected, however, things are smooth sailing. Images transfer quickly and allow for browsing of the camera from the phone to select images to transfer.

For remote control, Panasonic’s app is one of the best. Almost all manual controls are available right from the app, allowing changes to all exposure controls, focus points, drive mode, white balance, shutter controls and more. It even has a ‘jump’ mode where you can set the camera up and give the phone to a person in the picture. When that person jumps, the camera will take the shot at the apex of the jump. It’s a gimmicky feature, but it works well and could add some fun. The nicest thing about remote control with the GX8 is that the live view from the camera has a decent refresh rate and relatively low lag, especially compared to most of its competitors.
Other Features
I’ll just mention a few more things the camera has up its sleeve. The GX8 has a built-in intervalometer for creating time-lapse movies, star trails or any other plethora of reasons to capture images over a long period of time, and can then output that timelapse as a 4K video file right from the camera. It also has a ‘starlight AF’ mode, which is supposed to precisely focus on stars for night shooting. I didn’t get a chance to test that mode during my time with the camera, but it is intriguing. Also included are an in-camera HDR mode and, like most cameras, a panorama mode.
The GX8 is certainly a full featured camera, as you’d expect for a high-end mirrorless camera, but how do the images look?


Leave a Reply