In-Body Image Stabilization
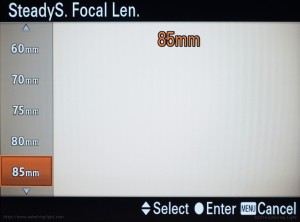
One of the biggest upgrades internally for the A7R II vs. the original A7R is the addition of in-body image stabilization (IBIS) utilizing a 5-axis sensor-shift stabilizer that Sony dubs “SteadyShot Inside.” The system is a refinement of the 5-axis stabilizer that debuted on the A7 II, though it’s been tweaked to improve sharpness with the smaller pixels on the 42 megapixel sensor.
The addition of IBIS to a full-frame mirrorless camera was a big deal, and it’s a big deal on an ultra-high resolution full frame sensor. Given the A7R II’s improved low light performance, the addition of IBIS makes this simply an amazing camera for low-light handheld photography. Also, as many shooters use A7 series cameras as a digital body for manual focus lenses such as older SLR lenses or the outstanding rangefinder optics for the Leica M mount, the addition of IBIS allows these manual focus gems to gain modern image stabilization.
I’m happy to report that the IBIS system in the A7R II is as effective as the one in the A7 II, which is an accomplishment given the high-resolution and required steadiness required to resolve the finest detail. Sony’s system is unique among IBIS manufacturers in that it works with optically stabilized lenses as well as non-optically stabilized lenses. When an optically stabilized native lens is used, the camera allows the optical stabilizer to correct the two axes of shake that the optical unit can correct. The camera body then corrects the other 3. When utilizing native E-mount lenses with electrical contacts that don’t have stabilizers, the full 5-axis sensor shift is in action. When utilizing manual focus lenses, the camera corrects shake only in 3 axes of movement (presumably the other two are best corrected with distance information from the lens).
Sony claims 4.5 stops of extra handholdability with their IBIS system, which I found a bit too optimistic. With both native lenses and adapted manual focus lenses I found the system to be good for an extra two to three stops of handholdability. This is below the very best optical stabilizers (and not quite as effective as Olympus’ excellent IBIS on the E-M1), but it is still a very good result, allowing me to get sharp shots in many demanding situations.
One thing to note is that to use the in-body stabilizer with manual focus lenses, one must first enter the focal length of the lens, so the body knows how much to correct. This is done quickly and easily via an on-screen menu, and thankfully can be assigned to the camera’s Fn menu or a custom button for super easy access. I still wish that Sony would allow that focal length input to be added to the EXIF information. I remarked on it in my A7 II review, and am disappointed to see they still haven’t added this capability.
Wi-Fi
Like all recent Sony E-Mount cameras, the A7R II has full-featured Wi-Fi capabilities, including remote control and the ability to transfer images from your camera to your tablet or smartphone.
The functionality is largely unchanged from earlier E-Mount cameras and is identical to the features in the A7 II. A hotspot can be created on camera through the menu, and you can then connect your mobile device to the camera by connecting to that hotspot. If you have an Android phone with NFC capabilities, tapping your phone to the NFC spot will help establish the link as well.
Transferring images between the camera and phone is easy and painless. You can select images either on the device or the camera, and a JPEG is then moved to the mobile device. One downside to the image transfer that still hasn’t been addressed is the inability to convert RAW images on the fly. Fuji, Olympus and even Samsung have robust RAW conversion capabilities in camera to adjust exposure, color and contrast settings, etc, and then create a full-resolution JPEG. With Sony’s cameras, you can transfer full resolution JPEG images if they are created at the time of capture, but if you shot RAW only, you are only able to transfer the low resolution JPEG preview that is embedded in the RAW file.
While I’d love full RAW conversion capabilities, at the very least Sony needs to implement a quick full resolution JPEG conversion with the default settings to allow for full resolution transfer of RAW images. There’s really no reason that Sony couldn’t add this feature to their Wi-Fi implementation, and I’m disappointed that in mid-2015, we’re still hampered by something that everyone else has managed to figure out by now.
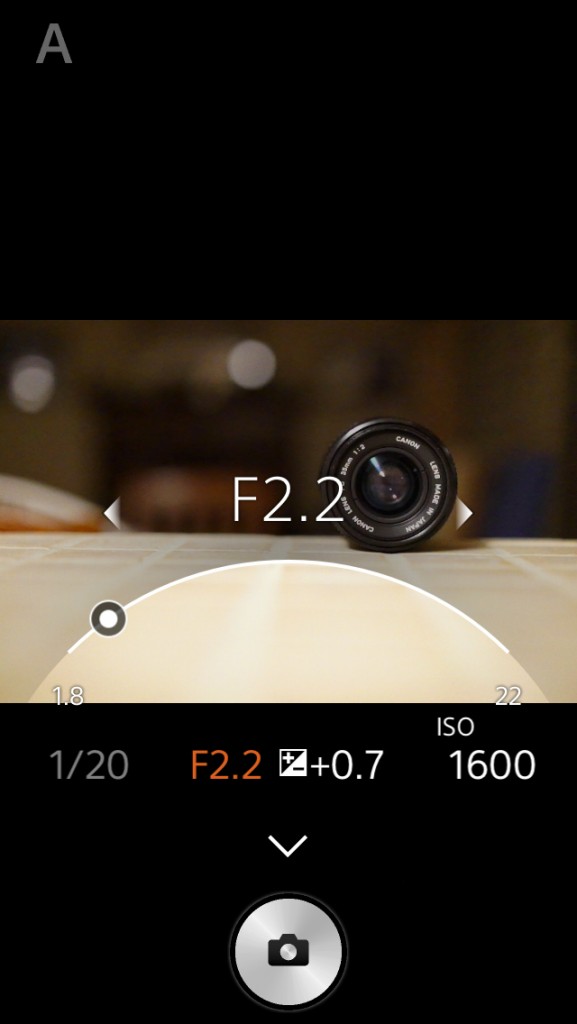
The remote control features are identical to other E-Mount cameras, as they use the same ‘Remote Control’ app from the PlayMemories store. By default, the camera comes with a crippled version of the remote control software, which then must be upgraded to the latest version by logging into a PlayMemories account and downloading the Remote Control app update. While this is free, it’s also a pain, so it would be nice to not require a login to upgrade a feature of the camera right away. The upgraded app works well, allowing for adjustment of exposure parameters, focus point and so on, though the app does have a fair bit of lag, and shot to shot times with remote shooting are quite slow. Sony is very close to being great with these Wi-Fi features, but they do need some refinement.
APS-C Lenses
The A7R II, like the other full-frame E-Mount bodies, has full compatibility with the entire APS-C lineup of E-mount lenses. When utilizing native lenses with electrical contacts, the camera will (by default) automatically switch to APS-C cropped mode, showing and recording an 18 megapixel APS-C sized crop of the full sensor readout, and making the lenses behave exactly the same as they would on an APS-C body such as the a6000 or NEX-7. With the 24 Megapixel A7 II, the resolution drop was to 10 megapixels, which has some limits with regards to print size. However, with the A7R II’s 18 megapixel crop mode, the final images still have plenty of resolution for good prints up to 24″ wide. The 18 megapixel crop also isn’t too far behind what the Sony a6000 can do natively, making the use of APS-C lenses a real possibility for regular use with the camera.
If you have some APS-C E-Mount lenses and are thinking of making the jump to the A7R II, don’t feel the immediate pressure to duplicate your APS-C lens lineup with all FE mount lenses right away, as you can feel confident in getting good images with your APS-C lenses. Of course, long-term, to get the most out of the camera, you’ll want to use the full sensor area, but it’s a handy feature to use certain lenses that you may already own.
There is also a setting to disable the APS-C crop, which will show the whole image circle. This may be useful for APS-C specific lenses that cover large portions of the full frame image circle. For instance, I own the Rokinon 12mm f/2.0 for E-mount, which has an 18mm effective field of view on an APS-C sensor. However, the image circle is actually larger, and while it doesn’t cover the full frame, the lens is capable of covering what would be a 1.3x crop. On the A7R II, this results in a 24 megapixel image with a field of view equivalent to a 15mm ultra-wide. Not bad at all!
Silent Shutter
One of the big criticisms of the original A7R was the loud and vibration-prone shutter mechanism. The shutter on the A7R II is brand new, and is a bit quieter than the one in the original A7R. However, most important is the addition of electronic first-curtain shutter on the A7R II. The original A7R didn’t have this option, and the heavy mechanism could sometimes introduce blur when using telephoto lenses at moderate shutter speeds. With electronic first-curtain shutter, there is no shutter movement until the exposure is completed, so vibration doesn’t happen.
In addition to the electronic first curtain shutter, the A7R II can utilize a completely silent electronic shutter, allowing for silent shooting for times where discretion is needed. The electronic shutter works well, and eliminates all vibration and noise that comes with making an exposure. This would be ideal for landscape work as well, but there is one odd quirk: the camera captures less data in the RAW file with electronic shutter active. Specifically, the camera goes from capturing a 14-bit RAW file to a 12-bit RAW file with the e-shutter, presumably to increase the read speed necessary for a functioning electronic shutter.
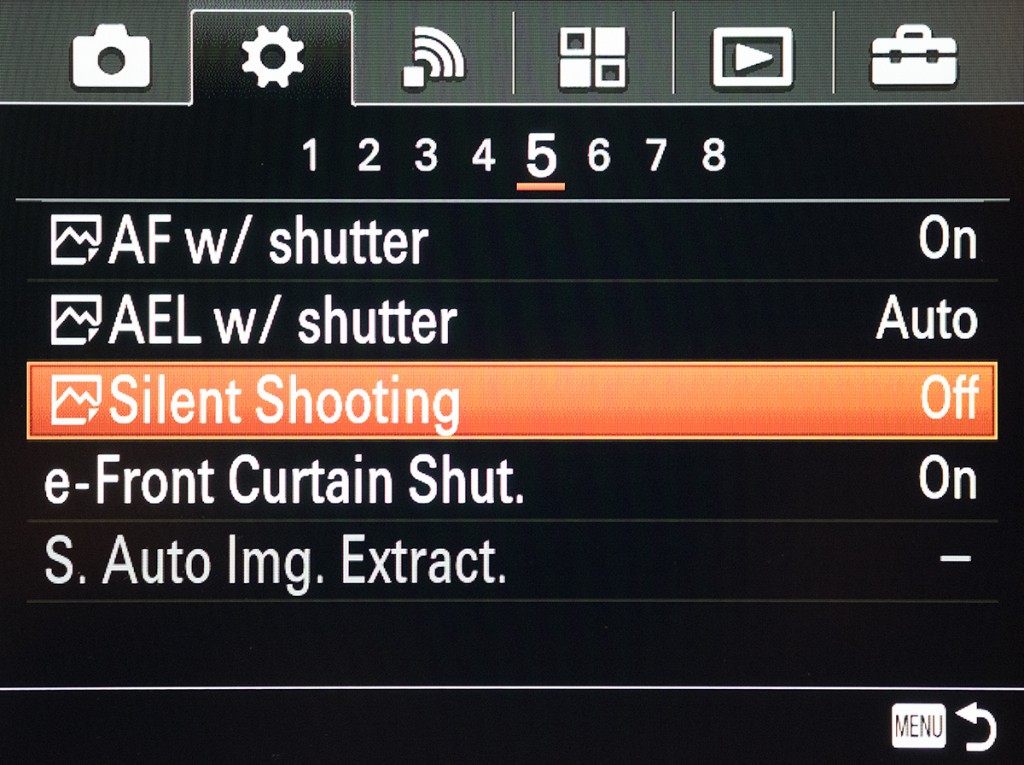
While the vast majority of images will not show a meaningful difference in information, the drop from 14 to 12 bits will increase read noise and therefore reduce dynamic range by around a stop. In situations where you’re pushing the DR to the limit, you’ll want to avoid electronic shutter. It also has the effect of increasing shadow noise by around a stop at lower ISOs, though the effect is negligible at higher ISO. Again: be aware. It’s definitely worth knowing about, but still: in areas where you need silent shutter, it’s worth the 1 stop penalty to be able to use it and get the shot without distractions, especially considering image quality is still exceptionally high.
Where this 12-bit reduction becomes slightly less acceptable in theory, is in the other areas where it’s implemented. The A7R II will also drop to 12-bit RAW when shooting in continuous shooting (burst) mode, when long-exposure noise reduction is turned on, and when shooting bulb exposures longer than 30 seconds. Why these situations require the drop in bit depth is less clear, but the biggest one to me is in longer exposures. Long exposures are really where you need the better noise floor, so losing it here is a bit of a disappointment…in theory . However, in practical effect, it’s really hard to discern if there’s any real meaningful issues. I shot many photos using Bulb mode during night or lower light shooting, with exposures of two minutes or longer in many cases, and image quality was still quite excellent, with the exception of the presence of some hot pixels, which I’ll discuss on the next page. It’s worth noting that the other Sony cameras also have this limitation, but the A7R II is the first that acknowledges it.
Other Items of Note
The shutter mechanism for the A7R II is all-new, and replaces the loud and clunky shutter of the original A7R. That camera could sometimes induce some shutter shock to images, creating some blur. This new shutter is quieter, and more robust: it’s rated for 500,000 shutter actuations.
Like the other recent E-Mount cameras, the A7R II has access to the PlayMemories Camera App Store, which enables the user to purchase new functionality for their camera. Some of these apps are gimmicky image editing programs that don’t do anything particularly special. Others give genuinely useful features to the camera, such as the Time Lapse app, which adds intervalometer functions to the camera for the price of $10. This feature is both nice for adding functionality, and a bit frustrating that such functionality wasn’t included by default on a $3,200 camera, when so many other makers have such an app in even lesser cameras. Even the Fuji X-T10, a $900 mid-range camera, has a built-in intervalometer.
The camera has excellent bracketing functions, allowing a wide range of bracketing options up to 5 shots at +/- 3 stops, which should be enough exposure latitude for any scene (provided the 1/8000s max shutter speed is sufficient). If you prefer closer segments, 5 shots at +/- 2 EV or up to 9 frames at +/- 1 EV are also available.
Battery life seemed worse in my shooting with the A7R II than it did with my A7 II. Especially notable was the morning I went out shooting at Hocking Hills State Park. I took 85 images over the course of 2 hours and used over 65% of a fully charged battery. While I did take many long exposures during this time, it was rather excessive battery drain. It’s definitely a good thing that the A7R II comes with two batteries. If you shoot for long stretches, you may also want to pick up a third.




Leave a Reply