
Table of Contents
Key Features
Some descriptions of key features are borrowed from my R6 review, in situations where the functionality is similar or identical. Pertinent changes have been described where differences occur.
Wi-Fi / Connectivity
Like all recent cameras, the R8 contains Wi-Fi and bluetooth connectivity, allowing for the wireless transfer of images to a mobile device, or remote shooting. The R8 has the same connectivity of other recent Canon cameras, such as the R5 and R6. Like the other Canon bodies, the initial setup process takes a few steps, but Canon has a nice guide built into their Camera Connect app to get you through the process. I have to say that the app and connection stability seems to be better on Android than on iOS. My iPhone still works with it pretty well, but I sometimes need to turn the camera on to enable the connection. Overall, the connection proecess isn’t as reliable as when using Android.
Once paired via bluetooth, opening the app will start looking for the camera and will connect to it within a few seconds. Like the R5 and R6, the camera will connect to your phone even when the camera is turned off, and you can browse and transfer images. When selecting images, you can choose which card slot to read the files off of, select your images and transfer them. You can transfer processed JPEGs or get full size JPEGs from RAW files in the transfer process, even if you didn’t shoot RAW+JPEG.
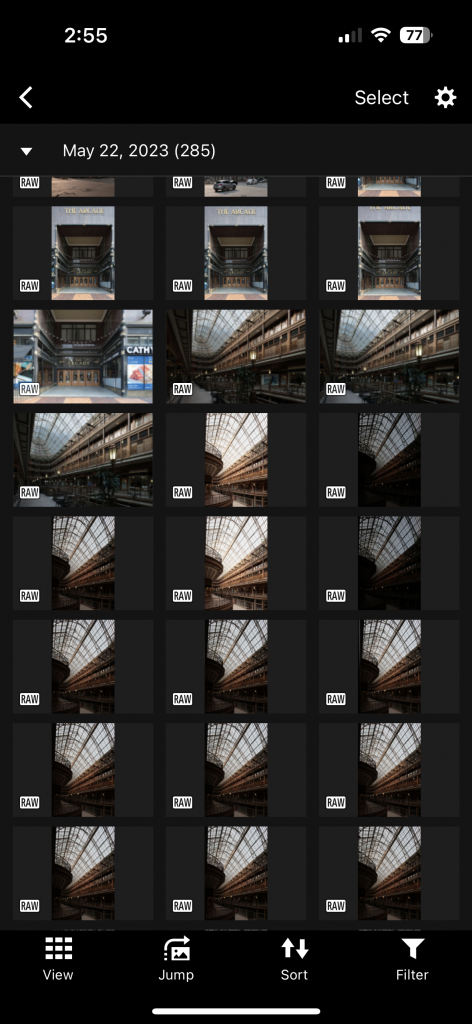
Selecting images for transfer is straightforward and simple. 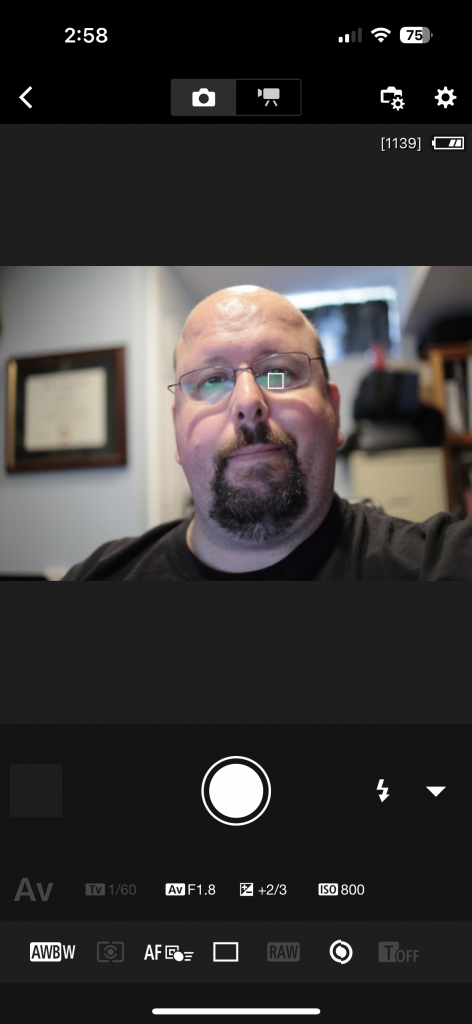
Remote shooting is full-featured and easy to use

The Camera Connect app can also transfer RAW files directly to a mobile device, allowing you to do mobile RAW processing in any apps that support the files (I prefer Lightroom Mobile). If you own an iPhone or iPad, you can use Canon’s DPP Express app and get the ‘official’ Canon RAW conversion on the go.
If the camera is switched on, you can quickly switch to remote shooting. If you’re already connected, the live view comes up in less than a second and is ready to shoot, with control over every major shooting setting, and even the ability to switch between stills and video. The preview image is also very clear and responsive. The app is really designed to be used in portrait orientation, so you get the widest view image when in this orientation, which might be a little counter-intuitive. You can rotate the view in the app, if you happen to be shooting with the camera on a tripod in vertical orientation.
The typical geotagging options are also available in the remote app, to allow for GPS tagging of your images, which works as expected. You can also set up auto transfer of images to your device while shooting, which happens quite quickly and can be used for review of images immediately after a photo session. Canon has a Bluetooth remote control capability in their app as well, which can take the place of a remote release, including for bulb exposures. Finally, you can set your camera’s clock to exactly match that of your smart phone.
Canon hasn’t made too many changes over the past few years with this app and setup, but it’s quite full-featured, and still works quite well.
Special Shooting Features
The Canon EOS R8 has several features to aid the photographer in special shooting tasks. Some of these are fairly common in modern cameras while others are a bit more rare. I’m going to quickly touch on four of these in this section: Focus Bracketing, Auto Exposure Bracketing, Intervalometer and Bulb Timer.
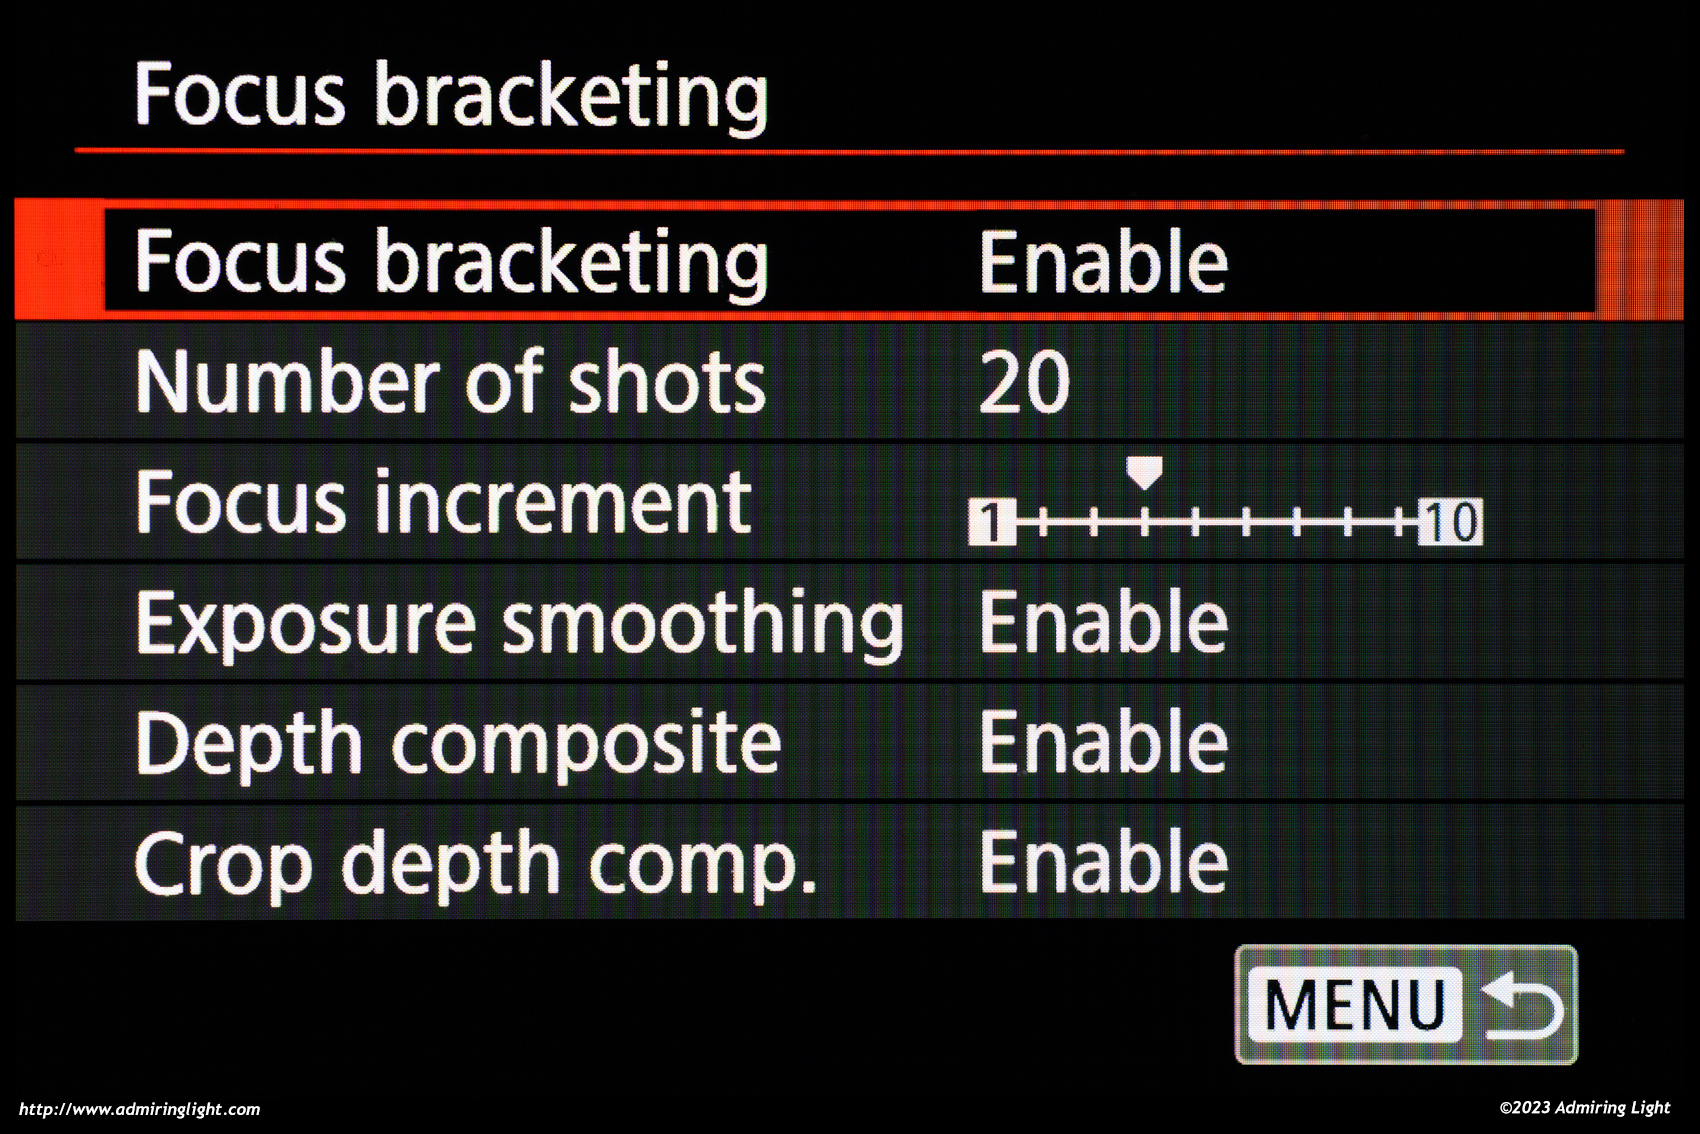
Focus Bracketing
Focus bracketing has been present on most of Canon’s recent cameras, allowing the shooter to set initial focus and then have a series of images taken at different focus distances, usually so all the images can be stacked during post-processing to increase depth of field. This can be used when shooting landscape photos with very close foreground detail, but is most commonly used in macro photography, where depth of field, even at smaller apertures, is exceptionally narrow.
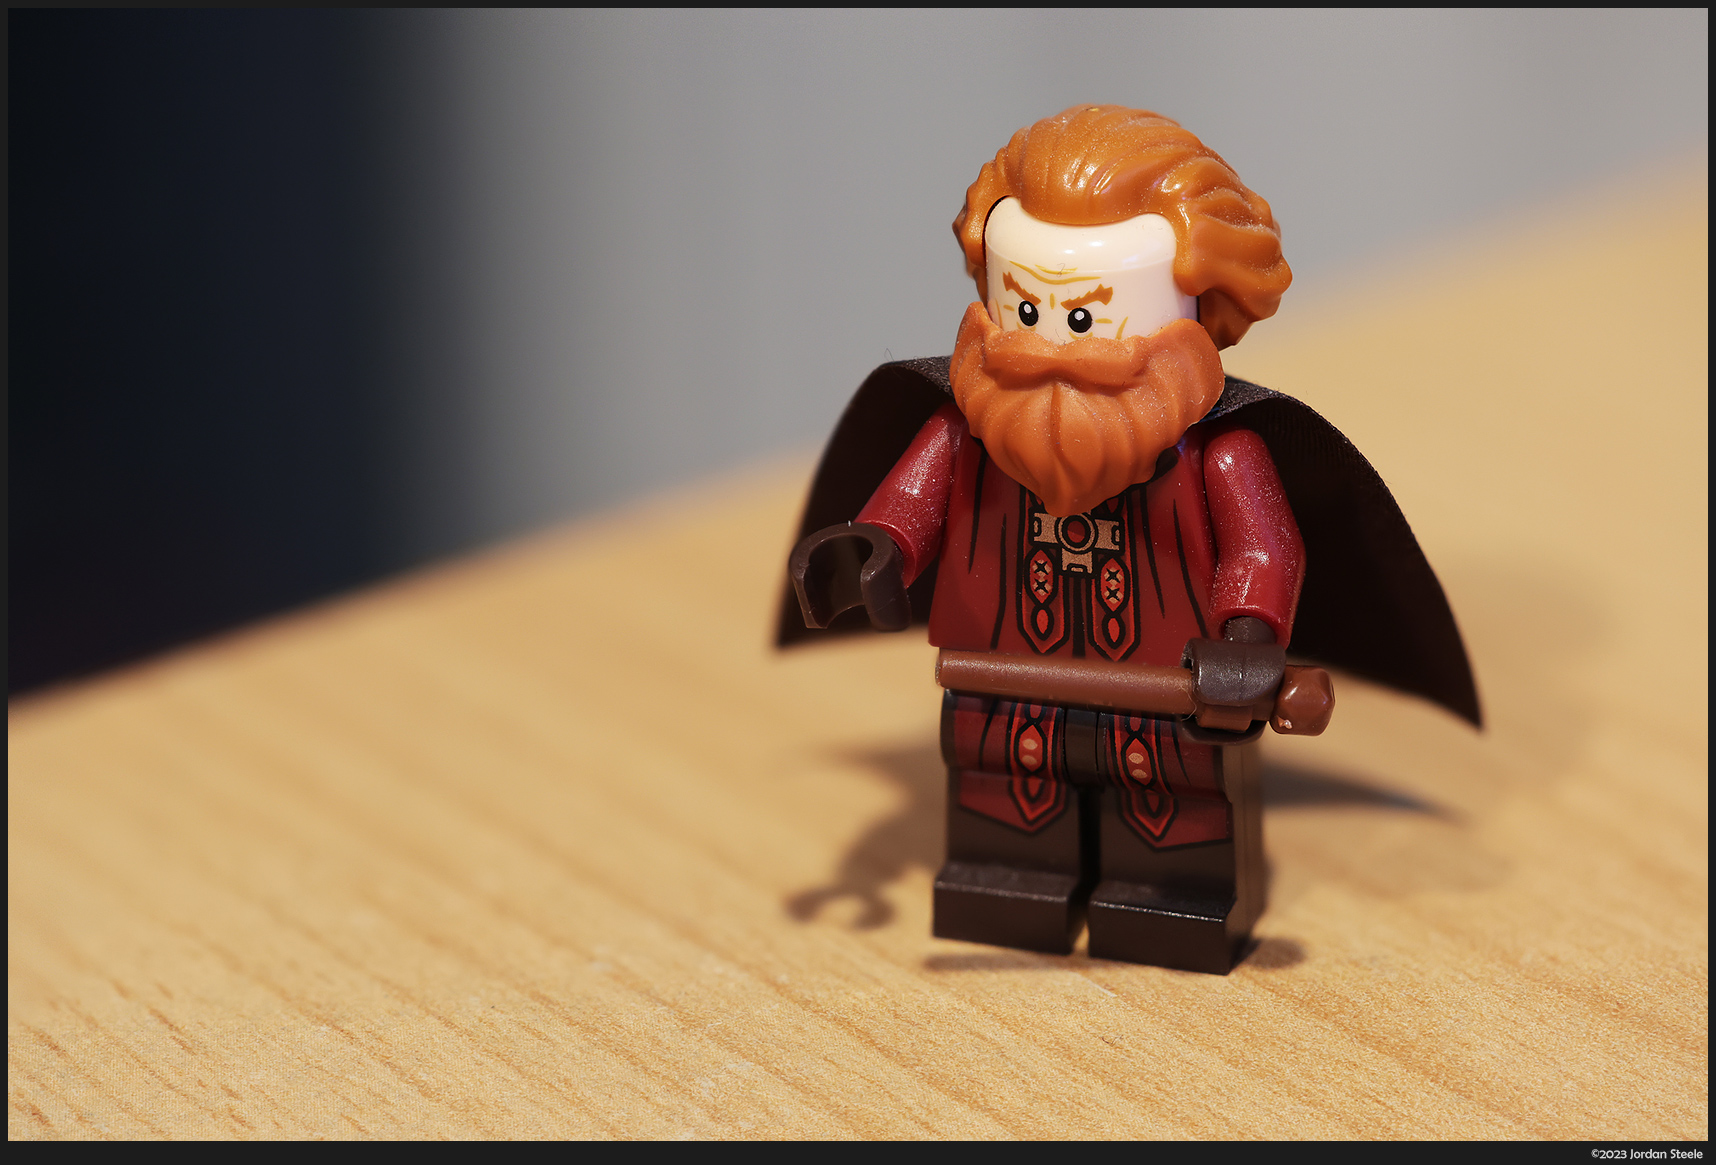
Unlike on the R6 and R5, however, the R8 will also create a depth composite focus stacked image from the bracketed photos, doing so automatically and relatively quickly. This file is a JPEG file and is made in addition to the RAW files. The in-camera stacking works quite well, though a dedicated stacking program like Helicon Focus still has more options and the ability for better stacks in tricky situations. One area where the in-camera stacking excels is in handling hand-held focus stacks, where the compositing engine does an outstanding job compensating for small camera movements, and produces sharp properly stacked output. The shot below is a 20 shot hand-held focus bracket, stacked in-camera. (Click to enlarge)
Setting up focus bracketing begins with enabling the feature in the menu. You can then set how many shots you’d like the camera to take (from 2 to 999), and the increment of focus between each shot. You can also enable Exposure Smoothing, which accounts for differences in brightness due to effective aperture at different focus distances. Finally, you can turn on the in-camera compositing feature, which will produce the stacked image. The crop in-camera is an option to crop excess from the final image, which would be needed for hand-held stacks, due to small camera movements.
Once you have the menu items set up to your liking, you focus to the closest point you want in focus and press the shutter button. The camera will then take rapid shots in electronic shutter mode only, shifting focus each time until the sequence is complete. The shot below was taken using Focus Bracketing on a tripod, 100 shots with an increment of 3, and composited using Helicon Focus.

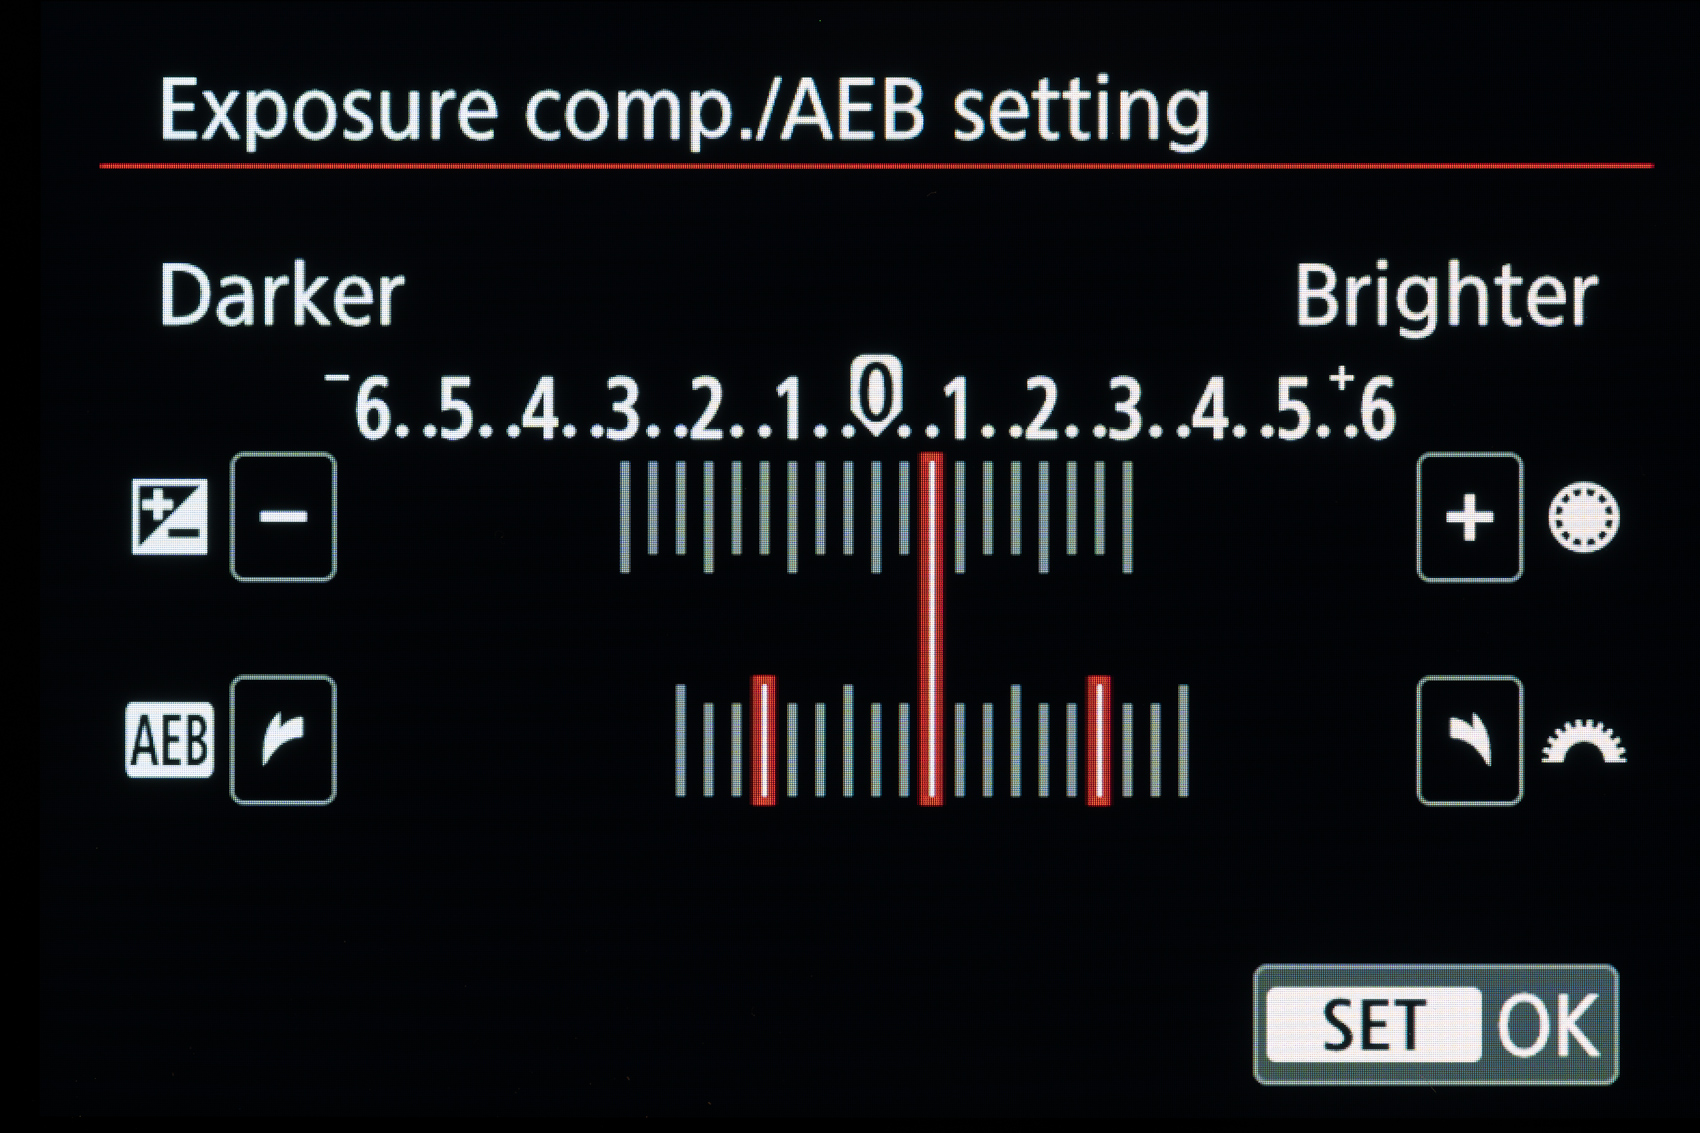
Auto Exposure Bracketing
Nearly every camera has some sort of auto exposure bracketing (AEB), and the R8 is no different. The AEB settings allow you to set a specific interval and have the camera take a set number of frames to bracket around that interval. The process on the R8 works about as you’d expect, with the ability to set the AEB interval to anything between 1/3 stop and 3 stops, and with a sequence of 2, 3, 5 or 7 shots, as well as the ability to have the camera cancel bracketing when turning the camera off. The bizarre menu quirk that was present on the R6 and R5 is still present on the R8, where the options for bracketing are split between multiple tabs of the menu. The interval and the ability to turn on AEB is in page 2 of the Camera tab, and all the other options on a separate page in the Custom Function tab. I have no idea why these aren’t all in one place.
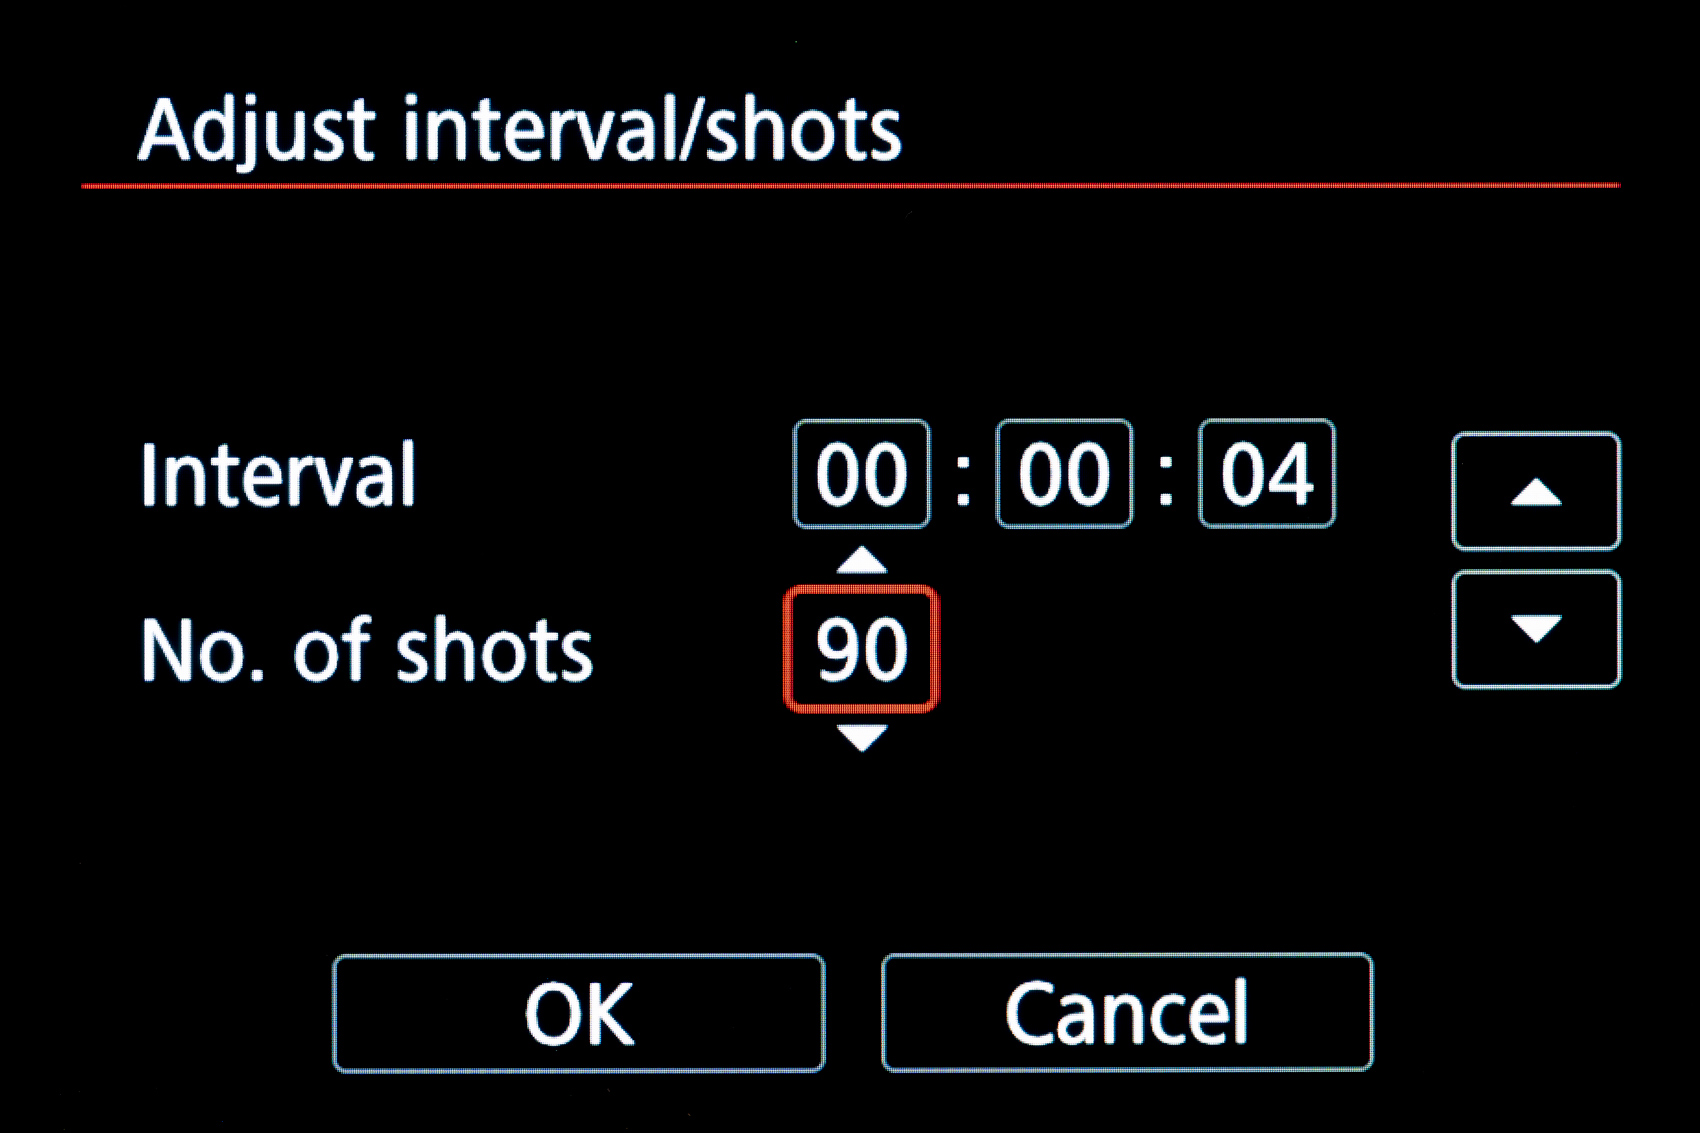
Intervalometer
The EOS R8 features an intervalometer as well, which isn’t surprising given that most every modern camera has one built in. The R8’s intervalometer works how you’d expect. You can set the number of shots and the interval. The R6 can take shots in intervals between one second and 99 hours, 59 minutes and 59 seconds, with the number of shots from 2 to 99. Beyond 99 shots, it switches to ‘unlimited’ mode, which will take shots until either the battery runs out or you switch the camera off.
Bulb Timer
Finally we come to one of my favorite little features: the Bulb Timer. In the normal shooting modes, the EOS R8 can take images at any shutter speed between 30 seconds and 1/4000s (or 1/16000s in electronic shutter). Like most cameras, for exposures longer than 30 seconds, you need to enter Bulb mode. Bulb mode normally requires a remote release to start and stop the exposure.
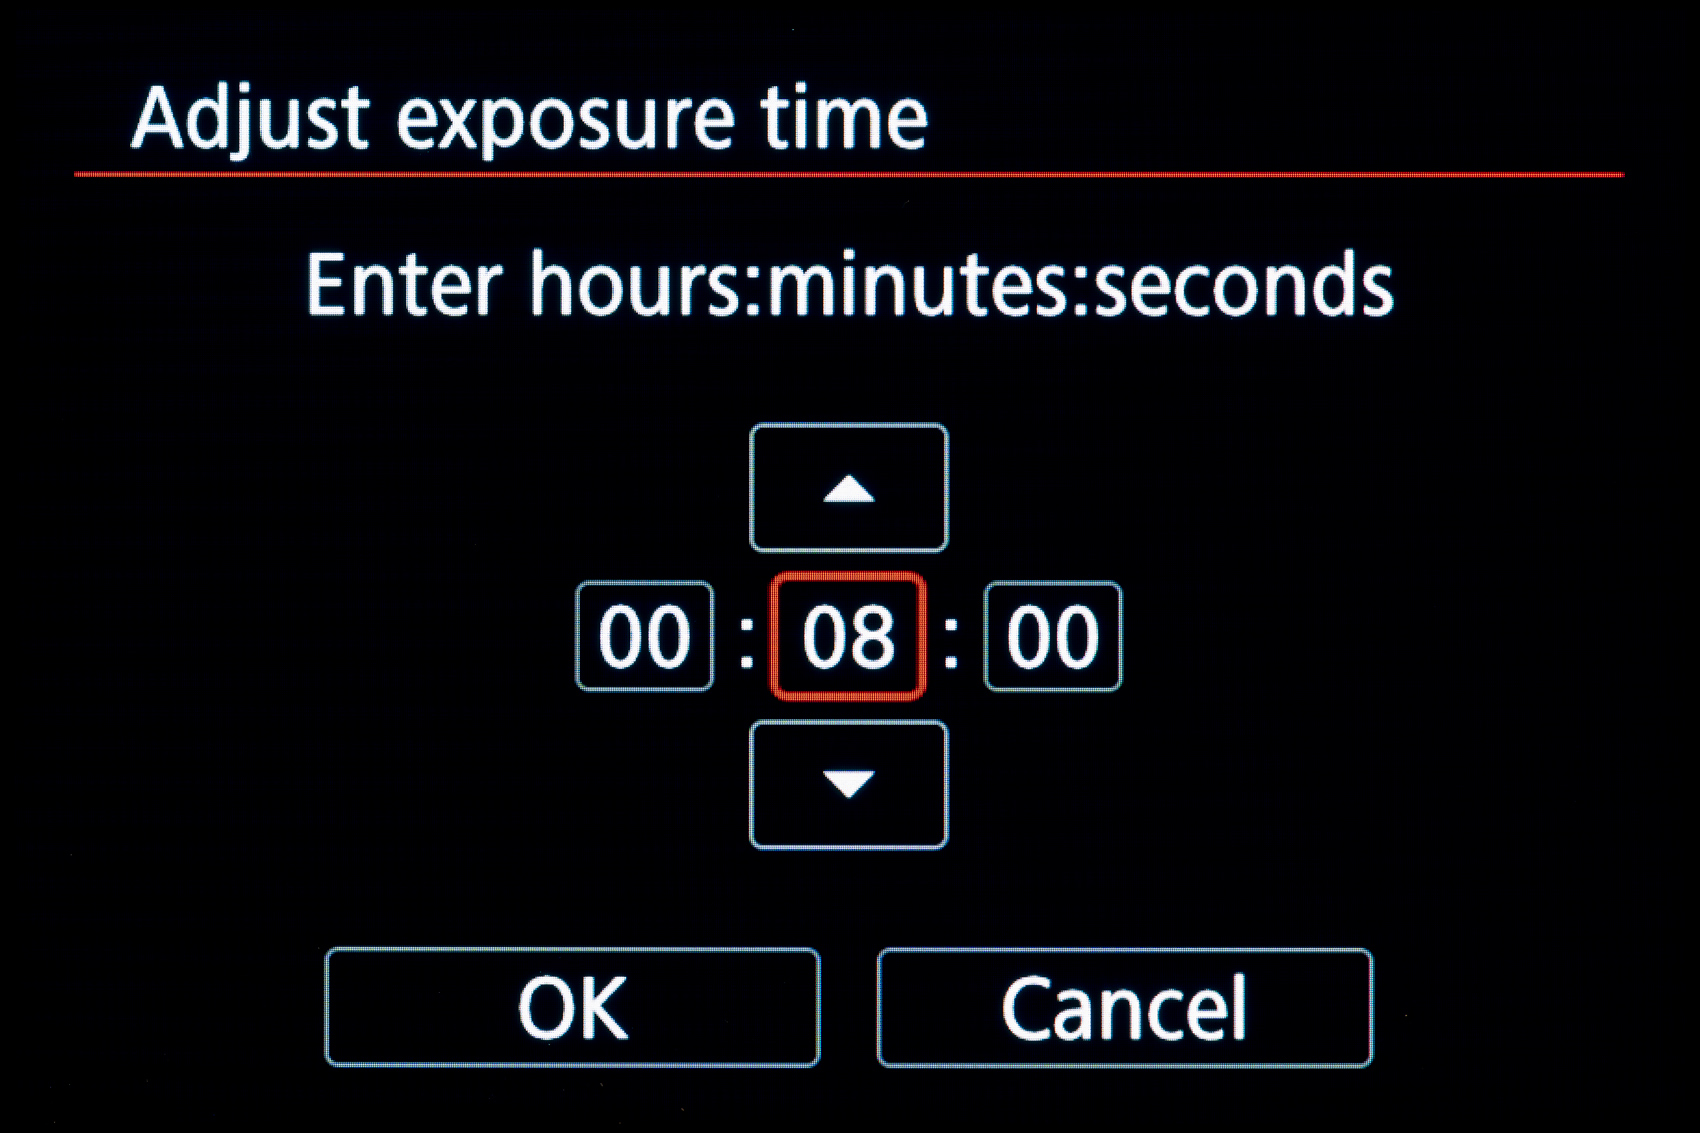
However, using a remote for bulb mode can be kind of annoying, especially if your exposures are very long, as you’ll need to manually keep track of the exposure time by watching the time clock displayed on the R8’s rear screen. It’s not a big deal, but I’d rather be walking around the area looking for potential future compositions than watching the timer. Enter Bulb Timer. Canon’s bulb timer allows you to simply input the length of exposure you want (up to one second shy of 100 hours), click the shutter and that’s it. The camera will expose for that length of time and then stop the exposure. It’s a very nice feature – I just wish you could add bulb timer settings to the Q menu to make changing the exposure time easier.
Miscellaneous Notes and Observations
- Electronic Shutter mode has essentially no restrictions outside of flash sync. Coming from the R5, R6, and RP, this is the first Canon mirrorless camera I’ve used where electronic shutter has no major shutter speed restrictions. On previous bodies, shutter speeds were limited to 0.5 seconds in any mode with electronic shutter. The R8 can shoot with electronic shutter at any shutter speed, from the fastest available 1/16,000s (compared to the 1/4000s max with EFCS), to multi-minute exposures using Bulb mode. The only thing you cannot do in electronic shutter mode is use flash. However, like most Canon bodies, electronic shutter does drop the R8 into 12-bit RAW instead of 14-bit, which can lead to more noise in the shadows if you really have to push exposure in post.
- Battery Life: The one big down side for the R8 in comparison to most of the other R series cameras is that it uses the much smaller LP-E17 battery, rather than the LP-E6NH battery used in the R5, R6 and R6 II. The LP-E17 is almost exactly half the capacity of the LP-E6NH, and as such, you get about half the battery life as you do with the R5 or R6 II. In practice, I was able to generally get through a day’s shooting on a single battery, but a spare battery or two is highly recommended.
- The mechanical shutter is fairly loud. The R8 uses the same shutter mechanism as the RP, so instead of the quiet little snick sound my R5 makes, the R8 emits a rather audible clack. However, due to the fast readout speed in electronic shutter mode, this isn’t that big of a deal, as e-shutter is available for when you need to shoot in quiet environments.
- Related to that last point, the R8 also features Canon’s high-frequency anti-flicker feature, like the R3 and R6 Mark II, which allows you to dial in an electronic shutter speed that exactly matches the frequency of any fluorescent or LED lights that may otherwise cause banding in your images. This can be performed automatically, where the camera will detect the frequency of the lights and set the shutter speed, or can be done manually.
- Unlike Canon’s higher-end bodies, the R8 does not allow you to save all of your settings to the SD card for backup. With the sheer quantity of settings available on modern cameras, this is a feature that should be on every camera, not just the most expensive bodies.

Leave a Reply